Tag Archives: F-150

Shifty Business – Another F-150 Failure

Pam and I had gone to the local pizza place for some takeout. In typical “I’ll buy, you fly” mode, Pam drove the F-150 with me in the passenger seat. She parked head-on by the front door and waited while I ran in for the goods.

It was just past closing time. Staffers killed the lights and ran out the door behind me.

Pam selected reverse and backed out, then pulled the lever for drive, hit the gas – AND THE TRUCK SURGED BACKWARD!

There wasn’t much room in the lot so she maneuvered to the curb, occupying about three marked spaces, and killed the engine.

It’s dark, beginning to rain, maybe three or so miles from home, hot food in the back seat, and we’re hungry. I called the kid for a lift home. We’d eat and think, then come back. Maybe the rain would pass.

The console lever felt sloppy, disconnected, I suspected a mechanical issue like a linkage or cable had worked its way loose. The console lever has a history. I removed the plastic shroud and felt around as best I could in the darkened cab; nothing felt out-of-place and my earlier hack/repair felt intact.

The kid soon arrived. We locked up and left to eat.

Sure enough, a bit of Internet searching turned up lots of similar failures! The most common issue came down to the cable-end detaching from the transmission lever. We returned to the truck armed with a good flashlight and I crawled under for a look. Before you ask, yes, the rainwater had pooled underneath…

Now it was clear that the cable-end was no longer attached. By manipulating the console and transmission levers it was possible to reattach, but when the console lever moved the cable end fell right off. The press-fit retention was no longer retaining!

I figured we could get the truck home, though. That’d free up parking for the restaurant and make for more comfortable work. The safety interlock only allow the truck to start in park and I could manipulate the levers to do that from beneath. With the truck started I could move the transmission lever into drive while Pam applied the brake. Then I’d crawl out she could drive home.

Pam was less than thrilled with the idea. But she did it. She probably pressed that brake pedal almost through the floorboard while I was under the truck fiddling with the transmission lever, engine running!

Cable end at top, transmission lever at bottom. The white plastic bit captures that knob.

The Root Cause
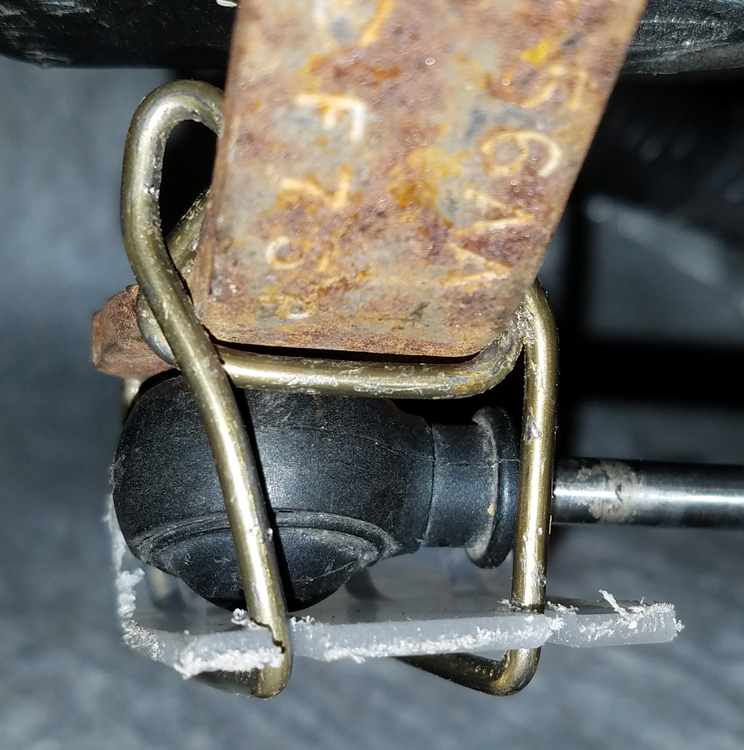
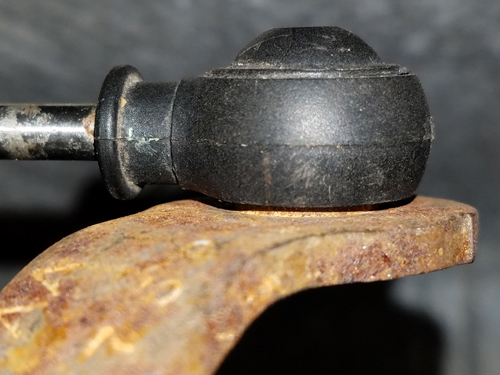
The cable end is a roundish half-bowl of plastic molded onto the semi-flexible metal rod that extends from its sleeve. In the picture you can see a white plastic insert fitting in the black bowl. The transmission lever has a protruding machined knob that’s captured by that bit of white plastic.

Failure occurs when the white plastic insert no longer captures the knob.

The cable assembly is not adjustable. The length is exactly what it is. That’s important because…

When the console lever’s placed in park – that’s how the truck spends much of its time since being manufactured – there’s much linear force being applied against the transmission lever. By that I mean if you select park and slip the cable end free of the transmission lever (easy to do, now that the part’s failed), the cable end springs out extend a good 3/8″ past the transmission lever. You cannot put it back in place without manipulating the console lever positions, the end-to-knob alignment is that far off. So of course that 29-cent bit of plastic will fail eventually! It’s designed to fail!

The Repair
The cable assembly – part number 4L3Z-7E395-CA for my 2004 unit – is available on Amazon for about $48. I don’t have a shop manual – that’s another story for another time – but it looks like it could be replaced in a couple of hours. Beer optional.

Obviously, a dealership could handle the repair. I heard that runs around $300-$350, including parts.

Ascension Engineering’s current location, under construction when Google Earth grabbed this shot.

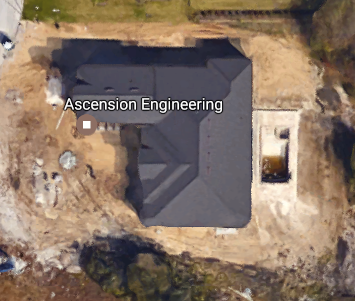
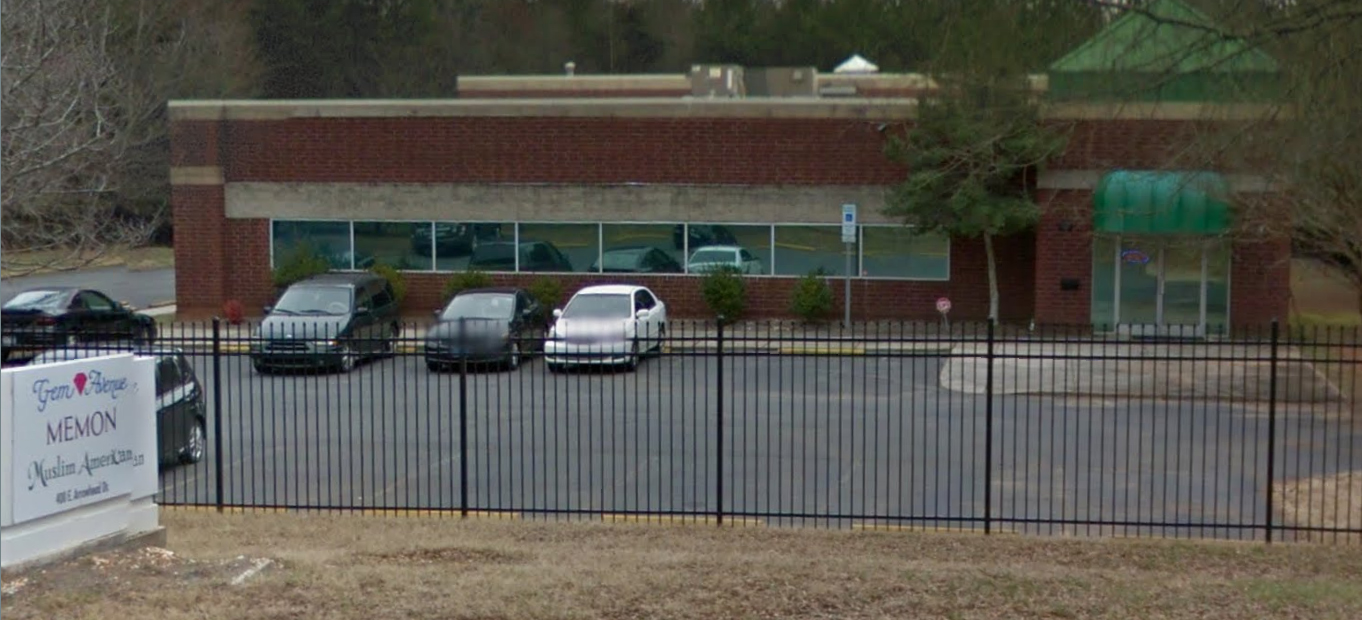
But let me introduce you  to Ascension Engineering. They produce a line of replacements for those little white pieces of plastic – apparently it’s a common failure mode across a wide variety vehicles, not merely Fords. The parts sell through their website, BushingFix.com. And business is apparently pretty damned good – Ascension Engineering’s principal relocated to some considerably nicer digs between May 2015 and March of 2016…

Shipping origin. Click for detail.

Y’know, $25 is a lot of money for a bitty bit of plastic. (Update: I learned, when sending a link to this article to the manufacturer for review, that the price is now reduced. My luck, right?) Okay, there’s design, tooling costs, manufacturing, but any number of Chinese outfits will do all that. Probably including the engineering design, too. It seems likely that they already manufacture those little bushings for the auto manufacturers. That Mr. Smith, he’s one smart cookie!

Screw it. I ordered a kit. There was sales tax, we’re both in Florida. And shipping was, I thought, a little high at just under $6 for USPS. The total cost was $32.29. I showed up at my door in a few days, shipped from Charlotte, North Carolina.

The cage-hack. See text for features. Click to enlarge for detail.

But First, An Interim Hack
A couple of weeks before the order and permanent repair, a simple hack was necessary to keep the truck on the road. A truck’s a useful tool here in rural Florida. There’s trash and recycling to haul, stuff like that.

I hacked up a little cage from (what else?) coat-hang wire – easy to work with, yet stiff enough to enclose the cable end.

It’s got some nifty features. First, it’s a cage. It’s solidly attached to the transmission’s shift lever and doesn’t contact the cable or its end except where it absolutely must, to prevent the thing from slipping off the knob. That contact is minimized by a custom thrust plate constructed of softer plastic. (Don’t be fooled, the thrust plate is from a plastic storage bin. We use the bins as high-walled litter boxes for our feline residents, and this is the material cut out to form a door.) Notice the bend in the thrust plate, and the cutouts so the cage retains it.

The hack would likely outlast the truck. But a replacement part was on the way.

The Replacement Bushing
It arrived in about a week. Here’s what $32.29 bought me:

The package, as received, followed by the individual parts and instructions. It’s actually well-thought out and about as foolproof as it gets. Click for a larger image.

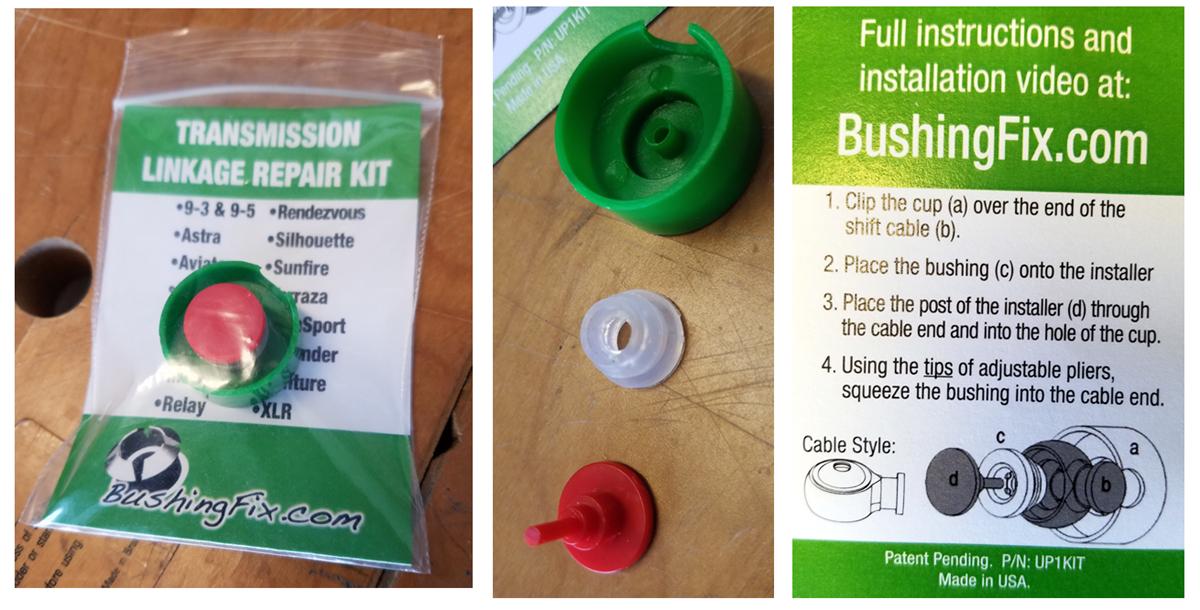
Three bits of plastic: the bushing itself plus two more that served as press-blocks. Click to enlarge the image and see the instructions. Leaning way towards foolproof, I’ve gotta say. It took me longer to remove my hack than it did to install the replacement.

Debris in my cable-end cup. The rear of the truck is the right side of the image. The cable presses rearward when the transmission is in park. Click to enlarge.

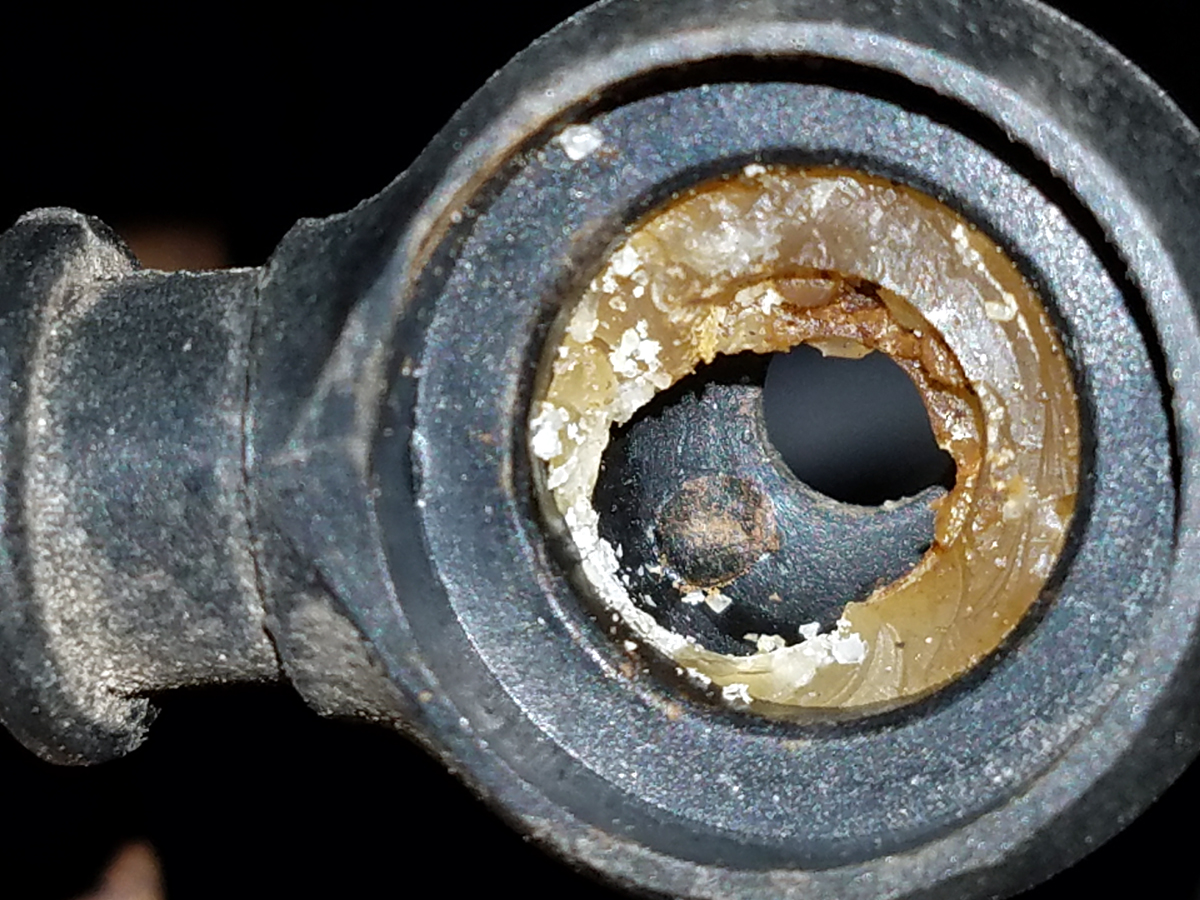
Part of the install involves digging out any old bushing parts from the cable end cup. I used a carbide-tipped scribe and it cleaned up in a few seconds. Here’s a shot of what was left in my cup before that step. Pretty disgusting. But what’s clear as an unmuddy lake is how the linear force of sitting in Park had basically ruined one side while the other remained basically unworn. Ford’s non-adjustable setup is designed to fail. It’s only a matter of time.

Bushing installed. Click to enlarge.

I assembled the sandwich of plastic bits and used a pair of Channellock pliers to give it a squeeze. I chose the Channellocks because of the adjustable jaws but I think a pair of ordinary pliers like those found in the average person’s tool bag would have done the job just as well. You’d need pliers, though, it’s a bit much for fingers alone.

Repair complete. Click to enlarge.

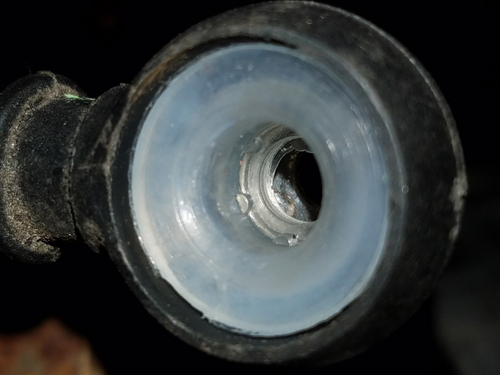
The rejuvenated cable end mated to the transmission lever with a satisfying click. Then I exercised the console lever. It felt great.

Notice in the completed repair image that there’s a slight gap between the cable-end cup and the transmission shift lever. This tells me that the replacement bushing is the proper size for the job. If the knob sat too deep then the two parts would rub, wearing the cable-end cup.

So How’s It Holding Up?
It’s been a few months since all this went down and so far, so good.

No issues, no complaints, the repair feels as tight as ever. How long will it last? Hard to say. Ford’s designed-to-fail assembly of the subsystem remains unchanged. What’s a worse environment? New Jersey winters or the Florida heat? Time will tell.

F-150 R203 Relay Failures Revisited

Back in 2013 I wrote about how my 2004 F-150 stranded me with an R203 relay failure. Since then I haven’t gotten any closer to a cause or solution. I’ve periodically replaced the relay as needed. But I’ve got a few more observations to add.

  • The DTC codes reported by the in-dash diagnostics (Engineering Mode) have meaningless meanings. D900 is just a general communication fault, not helpful, like “syntax error”.  D950 is apparently an instrument cluster issue. Both make sense. No power to the PCM will tend to inhibit communications. No PCM data means the instrument cluster will be data-starved despite being powered up. Duh.
  • When running, the R203 relay runs HOT. You can hardly keep a finger on it.
  • It’s not necessary to replace the R203 relay as soon as it balks. In the beginning, simply removing and replacing it will often get it working again. After a while, stronger ‘persuasion’ is needed. I’ve gotten good at pulling the relay, giving it a couple of raps on the pillar, and jamming it home – even in the dark. Eventually the relay requires replacement.
  • The part of the relay that fails is the energizing circuit. A completely failed relay seems physically distorted by the heat over time. I haven’t been able to correlate this to long trips – we don’t use the truck that much – but it wouldn’t surprise me. A cross-country trip involving all-day use might be troublesome. Conclusion: there’s a high current draw on that circuit somewhere. I doubt it’s the relay itself, too many parts have been in there. Maybe the fuse panel itself?
  • Ambient heat worsens the problem. In winter (like Florida has a ‘winter’, right?) the failure doesn’t happen as often. Leaving the kickpanel off helps extend life.  I’ve considered sandwiching the relay with Peltier devices, maybe something like this. Yeah, that’s fixing the symptom and not the cause, but WTF.

That’s about all I’ve got.

Maybe someone out there has the Ford shop manual pages for the fuse/relay panel? And/or the wiring diagram page(s) for the PCM power relay circuit? (2004 Ford F-150, SuperCrew, 5.4L V8, automatic transmission.)

Thanks, you great, big, wonderful Internet, you.

Stranded!

Built Ford ToughThe other night the Ford F150 left us stranded.

On the way to the local Johnny Rockets we hit some heavy rain. Some of the puddles on the right side of the road were rather deep and I found myself quite glad for the new tires we put on some months back. They cut right through but sent water flying everywhere. The truck didn’t miss a beat. We lucked out and parked right in front of the eatery, and went inside to consume heart attack inducing burgers washed down with some of the best milkshakes on Earth.

Satiated, we left the restaurant and climbed into the truck. I knew something was wrong the instant the key moved through the positions, the usual sounds and bongs were… well, they were different.

The mini message center displayed a cryptic message: Check Gauges in that odd font that LCDs use when making text from a limited set of segments. No starter crank at all. Instead, only an audible click coming from the fuse box under the passenger side kick-panel.

Hoping to avoid a call to Triple-A I dialed some friends to beg a ride (thanks Randy & Rose!), intending to leave the truck where it sat and troubleshoot in the morning. I felt pretty strongly that the problem was moisture-related – that was an awful lot of water! Maybe it would dry out overnight.

Around noon the following day I returned. The truck started as though nothing happened. I listened for a few minutes – nothing odd – turned it off and went home to get Pam to drive the thing home.

The round trip took about an hour. Pam jammed the key in and… yup, no crank! I got behind the wheel and gave the key a few disgusted twists. Wonder of wonder it fired and settled into a welcome idle. Pam drove it home without incident. But in the driveway it wouldn’t start again until the problem was found and solved.

When it comes to auto (and motorcycle) repairs there’s nothing in the world like the actual factory shop manuals. I have ’em for all our vehicles – except this truck. That’s because you can’t simply buy the shop manual for the F150. About the best you can do without springing for an expensive subscription to the online manual – like a dealer has – is to rent access to a section for a day. And that really sucks! So when things go wrong this truck either goes to the dealer or I use the Internet to learn from those before me.

The first likely candidate for failure seemed to be the Fuel Pump Driver Module (FPDM). This aluminum and plastic box, which regulates fuel pressure by modulating the voltage pulses sent to the fuel pump, is mounted directly to a steel crossmember under the bed, above the spare tire. The dissimilar metals tend to corrode the FPDM’s case, eventually allowing water to harm the circuitry inside. Water. I dropped the spare and unbolted the module, disconnected the single plug and brought it to the bench. The metal case was plenty corroded but intact. I didn’t open the plastic cover. Back onto the truck it went, with no change in symptoms. I never learned whether FPDM failure would cause a no-crank condition, or simply a no-start condition.

I entered the truck’s test mode and scrolled through the displays in mini message center. I found DTCs D900 and D950, but searching online for those codes brought no insight. It seemed like there was fuel pressure, consistent with an undamaged FPDM. There was lots of other stuff in the displays but much was undecipherable.

Actron CP9599
The Actron U-Scan model CP9599 is a dongle for your car’s diagnostic port which talks via Bluetooth to your smart phone.

I figured it was time to add a new tool to my collection: a reader to plug into the truck’s diagnostic port. I grabbed one of the bikes and took a ride down to the local parts store, the nearest was Advance Auto Parts. I intended to just get a simple reader but ended up going a little more spendy for a unit that promised to talk to my Android phone and deliver more comprehensive information. The device I bought is called U-Scan by Actron, model number CP9599.

I had problems with the CP9599. It didn’t seem to want to talk to my truck – but it had no trouble at all talking to my Jeep. This proved to be an important clue. Instead of just some random failure, now the trouble seemed like something was awry with the PCM. Maybe it had taken on some water? Maybe communications, maybe power, hmmm.

I pulled and inspected the condition of all the under-hood accessible plugs I could find, checking for changes after each. No change. In the passenger-side kickpanel box, I pulled and checked every fuse. No issues found. The fuse box also contains several relays of two different types. I began swapping positions of like-type relays to see whether the problem would move. After swapping the relays in positions R202 and R203 (the final pair to try – figures, right?) all the symptoms disappeared!

The truck cranked and started; the CP9599 connected and displayed DTC P1000 (which is normal after a PCM reset). I swapped the relays back to their original positions and the problem returned in all its glory. Relay R203 is documented as PCM power.

The original engineering part number for R203 was F57B-14B192-AA. It’s been superseded by Ford part number F5TZ-14N089-B, which costs about $15 from the dealer. I sprung for a pair of ’em, figuring a spare might be handy.

The truck is running normally now but there’s still a some work to do. I want to mount the FPDM on standoffs, which should halt the dissimilar metal corrosion. This ‘mounting on standoffs’ is part of the repair kit if you buy a replacement FPDM from Ford. Also, when in the fuse box, I found a significant amount of water in the passenger side rocker panel, which leads back from the area under the fuse box. I found the water accidentally. When pulling fuses from the back of the fuse box it seemed as though a dropped fuse could be troublesome to retrieve, so I reached down to see how hard that might be. There are no electrical connections in the rocker panel tunnel, only wire bundles, but I did find some evidence of moisture on a few fuse blades during my check. There’s water getting in there from somewhere! Online, some owners have mentioned trouble with gasket sealing on the brake/bed light housing, and I’ve had that off several times over the years. But I also have a sunroof. More investigation of the water’s source is needed.

Is Your 2004 Ford F150 Stuck in Park?

Mine is – er, was. It began as an intermittent – now there’s a word that no wrench likes to hear – problem. Then, one day, Pam almost got stranded.

I’ve got a pretty good relationship with the dealership. They handle most of the maintenance work on this truck mostly because I don’t have a shop manual. (They’re important, y’know, and I have one – or a set – for all of the other vehicles, but that’s a story for another day.) The dealership treats me pretty good. They allow me into the service area to chat directly with the techs and even cut me nice price breaks often enough to matter.

shifter hack - before and after
Shifter hack – before and after.

There’s a procedure in the user manual for overriding the interlock on the shifter. (I wouldn’t have thought so, but Pam suggested looking there. For once I listened. Smart girl.) So override I did and went to let the pros have a look. Two birds, one stone, it was time for the 75K service interval anyway.

A couple of hours later they told me the shifter assembly needed to be replaced. Actually, it was just one part of the assembly, but I had to buy the whole thing: $370 for the assembly, $130 for the labor to install it, plus tax and what have you. They’d have to order it so in the meantime the tech managed to get this one working. My options were to order the part and schedule the swap, or leave it be and see how long the fix would last. When it failed (when, not if, I noticed the choice of words) I could call the order in and they’d take if from there.

I chose to let it go for now and take my chances. That was the end of June and now it’s the beginning of August. I was in Asbury Park one night last weekend when it failed. I applied the override and got on my way.

Today I implemented my own fix, which I suspect will last longer than theirs. Before I continue I need to tell you that I’m not recommending that you perform this hack on your own vehicle. It disables a part of the safety interlock that prevents you from accidentally shifting out of Park. I personally don’t have a problem with that because I’m an Old Guy that grew up without those damned interlocks, back when you could freely shift the transmission however you pleased at any time.

Let me describe the interlock system. There’s a button on the shift handle which, through a series of internal levers, must physically move a lock that trips whenever the lever is placed in Park. That kind of interlock has been around forever. Some column shifters, for example, required you lift the handle toward you before they’d move out of Park. Implementations vary but they all accomplish the same thing. But there’s an additional interlock here, one that prevents the button from moving unless the ignition is on and your foot is on the brake. Naturally, this is an electrical interlock. There’s a solenoid in the shifter assembly that, when electrically actuated, moves a smaller physical interlock within the button, allowing it to move. This second interlock is tied into the ignition circuit and the brake lamp circuit. Yes, what you’re thinking is true; if your brake lights fail in certain ways or if the fuse for that circuit blows, you’re stuck in Park. When the system is working properly you listen can carefully and hear the solenoid actuating as you press and release the brake. The override mechanism mentioned earlier is a tiny lever that, when pressed, simply does what the solenoid does – allows the button on the shifter to move. In fact, when the system is working properly you can see the override lever move when the solenoid actuates. Whenever the lever is not in Park, the lever remains in the override position.

In my case, I knew from testing that the ignition, brake, and brake lamp circuits were operating properly. The intermittent was that sometimes the solenoid would actuate and sometimes it wouldn’t. Solenoids are simple electromechanical devices. I’m guessing that there could be an intermittent open circuit, maybe caused by something as simple as a solder joint gone cold from vibration or age. Or the mechanical part of it is sticky or binding, where the correct electrical signal is present but it can’t physically move, sometimes. Either way, the shifter assembly needs to be removed for disassembly and troubleshooting. There’s where that shop manual, the one I don’t have, would be handy.

My fix is simpler. I took a few small zip ties, daisy-chained them together to an appropriate length, and positioned them such that the interlock override lever is in a permanently-overridden position. The small daisy-chain of zip ties doesn’t interfere with anything and has enough slack that it can be removed without tools, if necessary for some reason. The zip ties are bright yellow so they’re obvious to anyone looking in there.

The effect is that the shifter now behaves as they used to in the 60s. You can’t shift out of Park without deliberation, but you can do so without the ignition on and stepping on the brake.

So, half a grand in parts and labor, before tax? Or a couple of zip ties? The difference will put lots of gas in the bikes. See you on the road.

Update, November 24, 2012: I’ve noticed that this is a popular post. Between the comments and the email, well, this is apparently a common failures. And here I just read in Fortune magazine about how hard Ford works to make sure their parts are reliable. But I digress. I simply wanted to add that my fix is working just fine to this day. Haven’t touched it. No problems.