 Introduction
Back in January I wrote an article about remedying failed certificate errors in Eudora. The article came about because I had a problem, the solution I puzzled out wasn’t terribly obvious, and I hoped to help others in a similar bind.
The article exceeded my expectations! Go read the comments and you’ll see what I mean. I’ll wait.
I’ve learned a lot, too! There are WAY more Eudora enthusiasts than I had ever imagined. There’s a rather active, reasonably high signal-to-noise ratio mailing list dedicated to Eudora for Windows (eudora-win@hades.listmoms.net) where you’ll find plenty of expertise. There I learned a few other tweaks and adjustments that have made my Eudora experiences even better, despite my many years using it.
Thank you all for your support and for passing my article around! I can’t believe some of the help desks it’s touched.
Criticism
While the solution I discovered was effective, I received criticism that it was more complicated than necessary. There’s no need to go through the steps to import or install a certificate, I was told, and in fact, the import/install steps could actually lead to other problems.
I’ve since learned that this is largely true – although I haven’t heard of any instances where trouble actually resulted from the import/install steps I outlined.
This article presents a shortened solution. It omits the unnecessary steps and borrows a bit from stuff on the mailing list. It includes images of the dialogue panels you can expect to see – because I received a ton of positive feedback on that.
Revised Steps
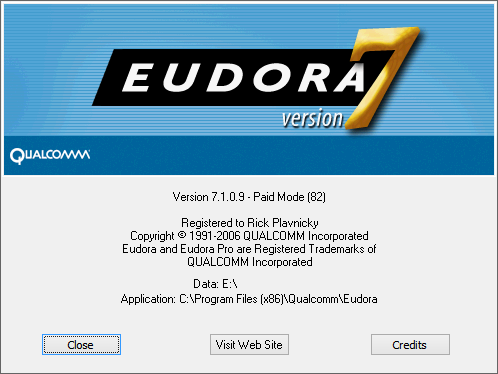
Once again, I’m using Eudora version 7.1.0.9. I can’t think of a single reason anyone should use an earlier version. I’m also running on Windows 10, which should lay to rest any doubt that Eudora runs just as well there as ever. I think that’ll stay true until email address internationalization becomes a standard and gains traction.
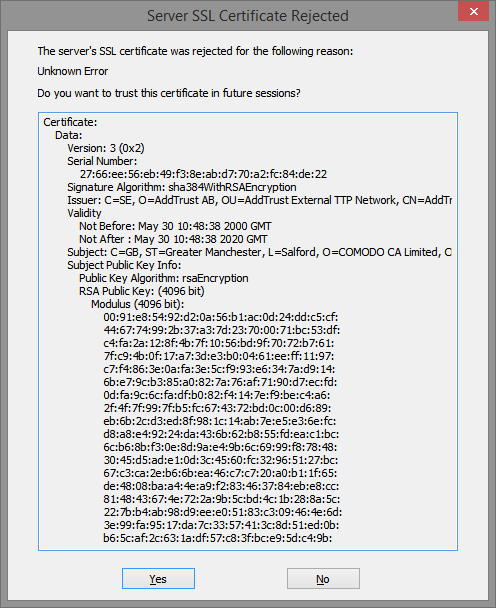
It’s most likely that you’ll encounter a certificate rejection when checking email; most of us check email more often than we send. And failures occur with increased frequency lately with Gmail; they seem to change certificates more often than other providers. So let’s assume that’s the case and Eudora has thrown this error panel at us during a check on Gmail:
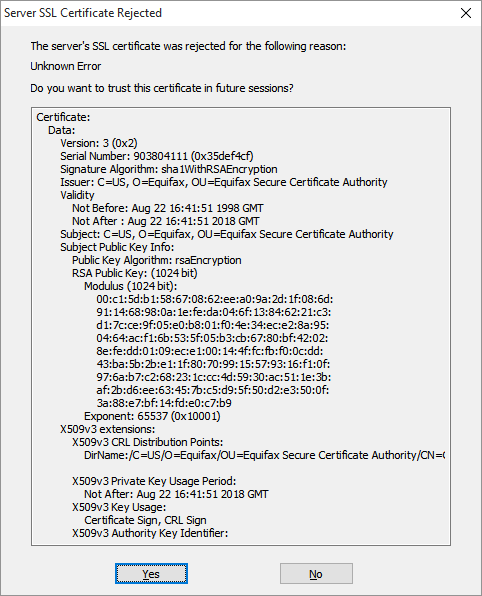
Take note of the Eudora Persona which produced the error, if you can. A clue sometimes be seen in the status area. In our example it’s one of my Gmail accounts.

If you use multiple Persona in Eudora and can’t tell which one experienced the certificate rejection then you’ll need to look at each until you find the correct Persona to adjust. Working with the wrong one will just frustrate you. We’ll come back to this a little later.
For now, Click the Yes button in the Server SSL Certificate Rejected panel. Clicking Yes won’t actually fix the problem but it’ll let Eudora finish the tasks that are running. Allow Eudora’s activities to continue until they complete.
Without closing Eudora, access the Properties of the Persona with the rejected certificate. In our example, we know the rejection occurred during a mail check so we’ll access the Incoming Mail tab of that Persona. The Properties appear in the Account Settings panel.
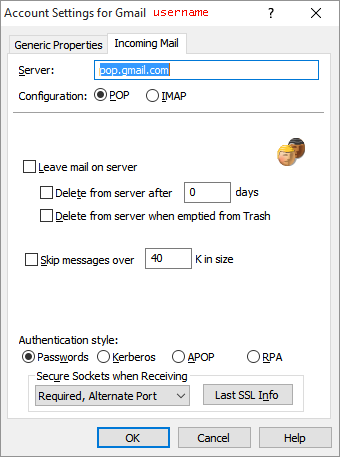
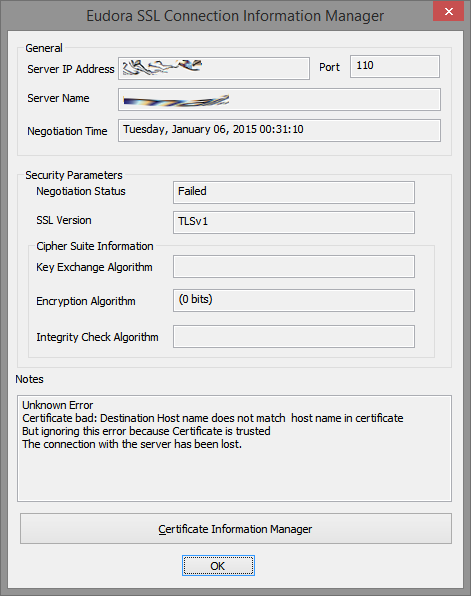
Click the Last SSL Info button. The Eudora SSL Connection Information Manager panel appears.
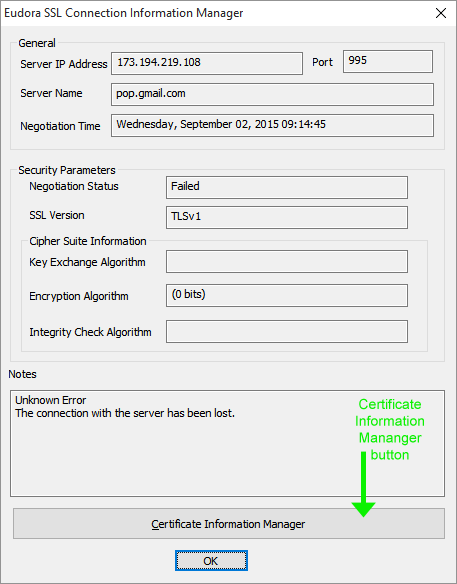
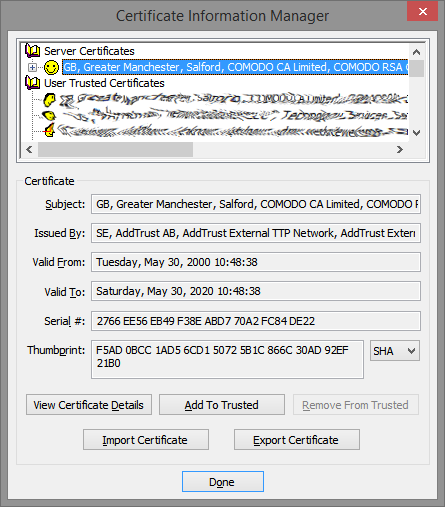
Click the Certificate Information Manager button, which I’ve indicated with a green arrow in the graphic above. DO NOT click OK if you are trying to get to the Certificate Information Manager. The Eudora Certificate Information Manager panel appears.
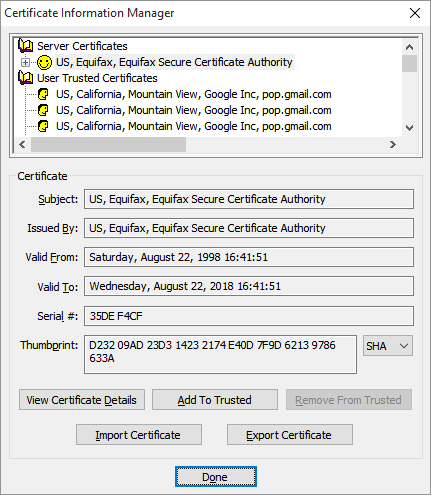
Looking at the top-most section of the Certificate Information Manager panel, the first row under Server Certificates (that’s the topmost row with the smiley face in the image above) contains the rejected certificate. You can’t actually see the problem certificate yet because it’s actually the last (or near the last) in a chain of certificates. Like the layers of an onion, you can’t see inside until you remove a layer. (Some refer to it as a series of locked doors, where you need to unlock one before you can see the next.) In any case, the rejected certificate we seek is inside. Click the plus sign next to the top smiley row to expand the chain, which is like peeling away the first layer of the onion.
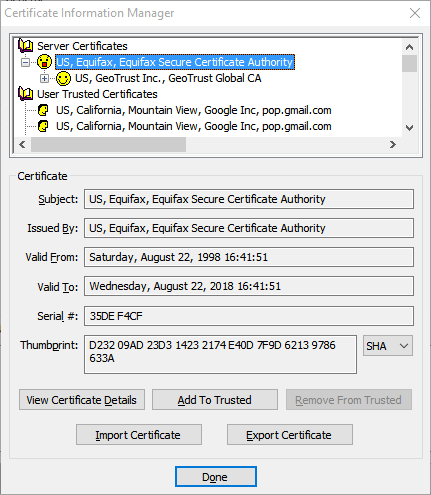
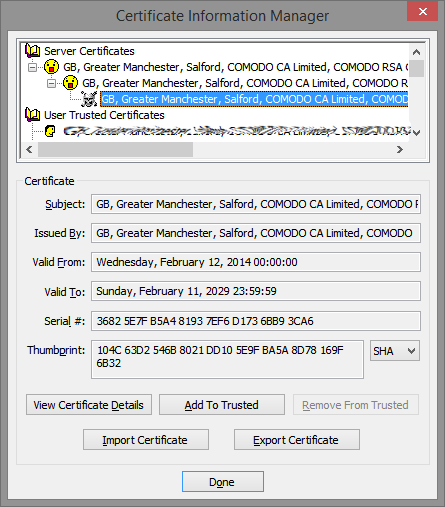
Keep expanding the certificate chain by clicking the plus sign of each certificate in turn, peeling away layer after layer of our imaginary onion. Eventually you’ll see a skull and crossbones icon instead of a smiley face.
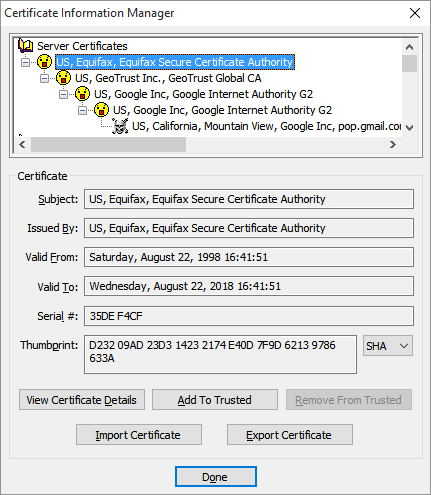
In this example I needed to expand the chain four times to reach the problem certificate. You may need to expand the chain more times or less times, and that’s perfectly okay.
Remember several steps back I mentioned working with the correct Eudora Persona when chasing a rejected certificate, and that I’d come back to it later? Welcome to later.
Let’s imagine for a second that we took all these steps and expanded the certificate chain all the way to the end – no more plus signs to click – yet didn’t end up with a certificate marked with a skull and crossbones. What then?
Simply, it means that we’re looking in the wrong place! If you’re not seeing the rejected certificate you can’t very well fix it, can you? So if you gotten this far with no skull and crossbones then close the Certificate Information Manager panel and close the Eudora SSL Connection Information Manager panel. Choose another Persona to work with (or the other tab of the Persona if you don’t know whether you were receiving or sending when the error appeared) and try again.
In order to get Eudora to accept the failed certificate you must first find it! And it’s indicated by a skull and crossbones icon. No skull equals no fix. This is sometimes a point of frustration.
But let’s assume that you have found the certificate with the skull and crossbones. Select it by clicking on it, so it looks like this in the Certificate Information Manager:
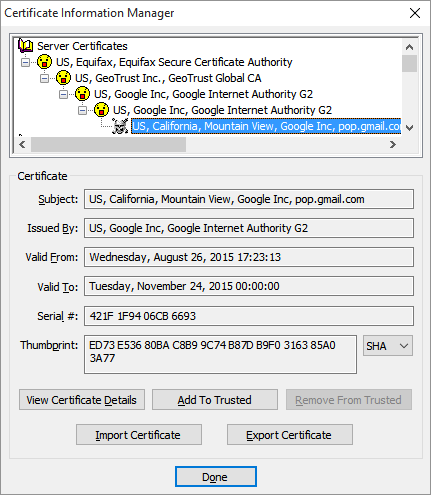
Now we’re ready for action!
Click the Add To Trusted button. When you do that the certificate chain we took so much trouble to expand will contract. The Certificate Information Manager panel will look much the same as it did when we first opened it.
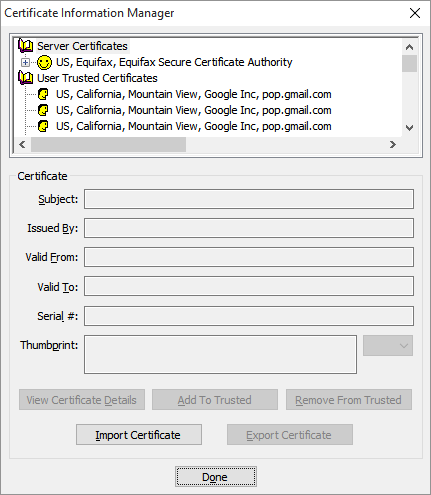
All that’s left to do is dismiss all these panels and test.
Click the Done button in the Certificate Information Manager panel to dismiss it. Click the OK button in the The Eudora SSL Connection Information Manager panel to dismiss it. Click the OK button in the Account Settings panel to dismiss it.
Finally, try collecting (or sending) your email again.
Did it work? It did? Great, you’re done. Well, until next time Eudora rejects an untrusted certificate.
Oh, wait, it didn’t work? Don’t panic. Just go back and follow the steps again.
Think back to the certificate chain, the onion layers, the series of locked doors. You need to trust a certificate in the chain before you can see what lies beyond it. The next run though the steps you’ll find that the certificate chain expands one more time before revealing another certificate with the skull and crossbones icon. When you find it, trust it and test again.
As non-intuitive as that may sound, you may need to step through the fix two or more times before achieving success.
Conclusion
If you compare this discussion to my earlier article you’ll see that there are actually WAY fewer steps. Once you’ve gotten through it a few times (and you certainly will if you use Gmail) you’ll see that trusting new certificates only takes a handful of clicks.
Yes, this article seems/is long and ponderous, with several panel images that look nearly the same. That’s because I’m trying to do a better job describing the areas about which I’ve fielded many questions privately.
A tip o’ the hat to Jane who, after working through some frustration, circled back to tell me what she had learned. Jane helped bring clarity to a possibly confusing section of this article. Thanks!

 Unix, drop-in, and run. I never looked back. Since then I’ve developed a rather extensive set of filters and such to efficiently manage dozens of email accounts and tens of GB of messages.