Tag Archives: virtualization

Hydra

This is a story about Hydra. Hydra’s a box, a computer, that up and died the death that old machines sometimes do.

Hydra, dead, stripped of all innards save the CPU and motherboard, awaiting transport to the parts shelf. Click for full-size image in a new tab.

I’m not 100% certain why Hydra’s dead, but pulling everything except the CPU still won’t elicit so much as a measly POST beep from the aged motherboard. I meter-tested the power supply. (I had another box on the bench for a PSU replacement, so I briefly stuffed the new PSU into Hydra just to make sure.) There’s nothing left to die except the mobo or CPU!

“So what,” I hear you thinkin’, “who TF cares about yer old box?”

Well, I do.

See, Hydra’s served the house in various capacities for a long, long time before retiring to the un-insulated sun room by the pool deck – most definitely an unfriendly environment for computers. The moisture, for one: Florida’s humid. The there are the temperature swings; in winter it can drop to near freezing and closed up in the summer it might reach 115F – or more. Environmental extremes have been the story of Hydra’s life. Finally, Hydra’s kinda remarkable in that it’s one of the oldest processors that Windows 10 will run on: the AMD Athlon 64 3200+.

So yeah, it’s worth taking a few minutes to write about little Hydra’s uncomfortable life.

Dex (left) & Reptar, circa 2002, about four years before Hydra.

For that we have to go back to Monday, October 16, 2006. That’s the day I walked into a local Comp-USA (remember that name?) with the idea of upgrading the house servers. At that time there were two. A more-than-10-year-old Pentium Pro box named Dex running Win2K Server, and a slightly newer Pentium II box named Reptar doing file server duty. Dex and Reptar were simply running out of gas.

I wanted a 64-bit CPU, a couple of GB of RAM with room for some future expansion. Remember, memory was considerably more expensive than it is today. I wanted the ability to use my existing IDE drives plus some SATA ports for later. I wanted a PCI bus. Overall, just something a bit more modern, something that would run VMware so I could segment the family’s workload.

I walked out with basically this:

Plus assorted support stuff like a cheap case, power supply, optical drive, and so on. Came to about six hundred bucks. Sure, I could have done better online but WTF, that’s what retail’s all about; getting it now. I assembled and IPLed the box that very afternoon and Hydra took up residence in the dusty, dark basement. Right next to the furnace. So Hydra’s twenty-four seven life began.

Hydra survived much abuse. The second phase of the basement refinishing project comes to mind. The drywall work deposited a coating of dust on Hydra’s innards that called for a weekly blowout to keep it from burning up. The un-insulated NJ basement was a harsh home.

Over the years came more memory, a couple of hardware RAID cards, more drives, and still more drives. That little case became dense and heavy. And ugly, as I cut more holes for fans. Yeah, it got loud, too, but in the basement it didn’t matter.

Win2K Server gave way to a bare-metal hypervisor for a while. Fast like shit through a goose, but tricky to administer. Bare-metal gave way to Linux. Hardware RAID gave way to software. The years passed.

In December 2012 we moved to Florida. We unceremoniously tossed Hydra into a U-Haul trailer with the rest of the stuff we didn’t trust the movers to handle and pulled to its new home.

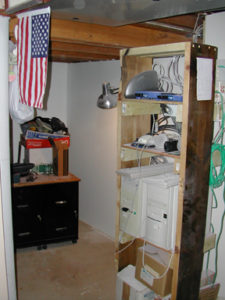
Environmentally the new network closet was an absolute step up. But Hydra screamed like a jet on full afterburner with all those drives and fans. In the old basement it didn’t matter but the closet’s just off the office, quite distracting…

By the end of the first quarter of 2013 Hydra entered a much-needed semi-retirement. The replacement, named dbox, was a quad-core box from the parts shelf, with way more memory and fewer, but higher capacity drives. By then all the server roles were running as virtual machine guests. The migration was super-fast and super-easy.

In the garage, Hydra rested on the parts shelf before being called upon to support a Facebook project Pam had launched. I don’t really remember exactly when that began. Hydra was much quieter, stripped to a single drive running Windows 7. We shoved the headless case under the healing bench near the door and Pam ran her project from her Windows desktop, logged in using the Remote Desktop Connection tool. It wasn’t the highest performance configuration in the world but it got the job done.

Without the benefit of a proper UPS poor Hydra suffered a new peril: power glitches. We got used to looking for the power light under the workbench as we passed. If it was dark anyone could thumb the power button and go about their business.

That arrangement lasted about a year. Pam’s project wound down and Hydra went back into retirement.

Meanwhile, in the real world Windows 10 was getting legs. I’d come to like the Tune In Radio app. One can only take so much country and classic rock from the local stations and I’d had my fill. I wondered… could a Windows 10 box and Tune In Radio bring superior tunes to the pool deck? Was there any spare hardware around that could run Win10? Microsoft took great pains to exclude older hardware, even while offering free upgrades. Would Win10 run on Hydra’s CPU, now approaching twelve years since its introduction?

It turns out the answer was yes! Well, there were issues to overcome along the way, but yes.

A Win10 license costs more than the budget for this venture, which was exactly zero. Microsoft was still offering free upgrades from Win7 so the plan was to follow that path. Hydra had a Win7 Pro 64-bit OS from Pam’s project so we got that upgrade started. The several-gigabyte download took forever over the crappy ADSL connection. Then the upgrade failed.

That’s how I learned that Hydra’s Athlon 64 CPU doesn’t support the CMPXCHG16B instruction. This instruction, commonly called CompareExchange128, performs an atomic
compare-and-exchange between 16-byte values. And 64-bit Win10 (and 64-bit Windows 8.1) requires this instruction.

CMPXCHG16B isn’t required by a 32-bit Win10. The path became clear. Install a 32-bit Windows 7. This meant giving up any installed memory over the 3.5 GB mark. Fine. Get Windows 7 activated. Install all the service packs and patches. Finally, upgrade it to Win10. Remember that crappy little error-prone ADSL connection? That, along with the lengthy downloads and general slowness of the ancient hardware… there went a couple of days. Thankfully it didn’t need much attention.

But it worked!

And that’s where Hydra lived out its days. Providing great radio out on the pool deck. Enduring temperatures from near-freezing to well over a hundred degrees.

The evening of May 15, 2017, I attempted to kick Hydra to life to collect the latest Win10 updates. I thumbed the power button, and heard it starting up as I walked away. Later I noticed it had gone down. Hydra never booted again.

A few interesting observations…

  • Hydra began and ended life on a Monday. (Watch out for Mondays.)
  • Hydra ran ten years and seven months. 10-7. If you remember the old 10-codes the cops and CBers used to use, 10-7 means “out of service”.
  • Hydra ran 24/7 for most of its life. If we assume about 9 years of total running life, that works out to about three-quarters of a cent per hour against its original installed cost. Absolutely worth every nickel.
  • Hydra died on its side, on the floor, in an overheated room, alone, behind the bar. A noble death.

And that’s where today’s story ends.

Maybe you’ve got an old AMD Athlon 64 3200+ floating around in your parts bin? Maybe you’d like to give it a new home? If it resurrects Hydra then it’s mine and I’ll give you a nice, fat mention in this story AND a link in the sidebar. If not, I’ll send the chip back to you with my thanks for a noble effort.

But wait! What about the tunes out on the deck? It just might be resolved. Well, at least some preliminary testing seems to show that it can be resolved with a little bit of creativity.

So that part of the story needs to wait. But I can promise you that if this scheme works it’ll be even weirder.

Communicating With The Outside World

I recently set out to upgrade a virtual host server from VMware Server to Oracle’s VirtualBox. The upgrade was a huge success. This is one of several articles where I talk about various aspects of that upgrade, hopefully helping others along the way. You might want to go back and read the introductory article Virtualization Revisited. Added 5-May-2011: Originally written using Ubuntu Server 10.04, this configuration also works without change on Ubuntu Server 11.04.

One of the things that I wanted from the new VM host was alerts for anomalous situations. Manually polling for trouble begins as a noble effort but trust me – after a while you’ll stop looking. About a year ago I was almost caught by a failing hard drive in a RAID array. Even after that incident, within a month or two I had pretty much stopped paying regular attention.

While setting up monitor/alert mechanisms on an old Windows server is quite the pain in the ass it’s a snap on Linux. Delivery of alerts and status reports via email is just perfect for me. All I wanted was the ability to have the system generate SMTP traffic; no messages would ever be received by the system. To prepare for that I set up a send-only email account to use the SMTP server on one of my domains solely for the VM host’s use as a mail relay. Then I got on with configuring Postfix, the standard Ubuntu mailer – one of several excellent sendmail alternatives.

Now maybe I’m just a dummy, but I found various aspects of the Postfix and related configurations to be a little tricky. Hence this article, which details what worked for me – and should work for you, too.

(In the stuff that follows, my example machine is named foo and it’s on an internal TLD called wan. My example machine’s system administrator account is sysadmin. My SMTP server is on mail.example.com listening on port 1212. The SMTP account is username with a password of yourpassword.)

Getting Started – Basic Configuration

Begin by installing Postfix, as you would any package.

$ sudo apt-get install postfix

For now, just hit Enter through the install questions. We’ll configure it properly following the install. You’ll be asked for the general type of mail configuration and Internet Site will be the default. Accept that by pressing Enter. You’ll be asked for the System mail name and something will probably be pre-filled. Accept that, too.

Now, go back and do a proper basic configuration.

$ sudo dpkg-reconfigure postfix

Several questions will follow. Here’s how to respond.

For the general type of mail configuration choose Internet Site.

Set the domain name for the machine. The panel provides a good explanation of what’s needed here, and chances are good that it’s pre-filled correctly. By example, foo.wan.

Provide the username of the system administrator. The panel provides a good explanation of what’s needed here. Use the name of the account that you specified when you installed Ubuntu. By example, sysadmin.

Provide a list of domains for which the machine should consider itself the final destination. The panel provides an OK explanation and it’s probably already pre-filled more-or-less correctly. But look carefully at the list that appears in the panel and edit it if it has obvious errors like extra commas. Again, using my example machine, a list like this is appropriate:

foo.wan, localhost.wan, localhost

You’ll be asked whether or not to force synchronous updates on the mail queue. Answer No, which is likely the default.

Next, specify the network blocks for which the host should relay mail. This entry is pre-filled based on the connected subnets. Unless you’ll be using an external SMTP server that requires it, you can simply remove all of the IPv6 stuff that appears here, leaving only the IPv4 entry which will probably look something like this:

127.0.0.0/8

Specify the mailbox size limit. The default is zero, meaning no limit. Accept that. Remember, all we’re planning to do is send mail, not receive it.

Set the character used to define a local address extension. The default is +. Accept it.

Choose the Internet protocols to use. Again, keeping with our earlier IPv4 decision select ipv4 from the list and accept it.

That’s it for the basic Postfix configuration! Next you’ll configure Postfix to do SMTP AUTH using SASL (saslauthd).

SMTP AUTH using SASL (saslauthd)

Since there are several commands to issue as root it’s convenient to sudo yourself as root to save some typing. Good practice dictates you should logout the root account just as soon as you’re finished.

Be careful. In this list of commands there is one – it sets smtpd_recipient_restrictions – that is quite long and may have wrapped on your display. Be sure to issue the entire command.

$ sudo -i
# postconf -e 'smtpd_sasl_local_domain ='
# postconf -e 'smtpd_sasl_auth_enable = yes'
# postconf -e 'smtpd_sasl_security_options = noanonymous'
# postconf -e 'broken_sasl_auth_clients = yes'
# postconf -e 'smtpd_recipient_restrictions = permit_sasl_authenticated,permit_mynetworks,reject_unauth_destination'
# postconf -e 'inet_interfaces = all'
# echo 'pwcheck_method: saslauthd' >> /etc/postfix/sasl/smtpd.conf
# echo 'mech_list: plain login' >> /etc/postfix/sasl/smtpd.conf

Then press ctrl-D to logout the root account.

The next step is to configure the digital certificate for TLS.

Configure the Digital Certificate for TLS

Some of the commands that follow will ask questions. Follow these instructions and answer appropriately, modifying your answers to suit your situation. As earlier, sudo yourself to root and logout from root when finished.

$ sudo -i
# openssl genrsa -des3 -rand /etc/hosts -out smtpd.key 1024

You’ll be asked for the smtpd.key passphrase. Enter one and remember it. You’ll need to type it twice, as is customary when creating credentials. Then continue.

# chmod 600 smtpd.key
# openssl req -new -key smtpd.key -out smtpd.csr

You’ll be asked for your smtpd.key passphrase. Enter it.

Next you’ll be asked a series of questions that will make up a Distinguished Name, which is incorporated into your certificate. There’s much you can leave blank by answering with a period only. Here’s a sample set of responses (underlined) based on my US location and example system.

Country Name (2 letter code) [AU]:US
State or Province Name (full name) [Some-State]:Texas
Locality Name (eg, city) []:.
Organization Name (eg, company) [Internet Widgits Pty Ltd]:.
Organizational Unit Name (eg, section) []:.
Common Name (eg, YOUR name) []:Rick
Email Address []:sysadmin@foo.wan
A challenge password []:some-challenge-password
An optional company name []:.

Then continue.

# openssl x509 -req -days 3650 -in smtpd.csr -signkey smtpd.key -out smtpd.crt

You’ll be prompted for your smtpd.key passphrase. Enter it.

Then continue.

# openssl rsa -in smtpd.key -out smtpd.key.unencrypted

You’ll be prompted for your smtpd.key passphrase. Enter it.

Then continue.

# mv -f smtpd.key.unencrypted smtpd.key
# openssl req -new -x509 -extensions v3_ca -keyout cakey.pem -out cacert.pem -days 3650

You’ll be asked for a PEM passphrase. Enter one and remember it. You’ll need to type it twice, as is customary when creating credentials.
Like earlier, you’ll be asked a series of questions that will make up a Distinguished Name, which is incorporated into your certificate. There’s much you can leave blank by answering with a period only. Here’s a sample set of responses (underlined) based on my US location and example system.

Country Name (2 letter code) [AU]:US
State or Province Name (full name) [Some-State]:Texas
Locality Name (eg, city) []:.
Organization Name (eg, company) [Internet Widgits Pty Ltd]:.
Organizational Unit Name (eg, section) []:.
Common Name (eg, YOUR name) []:Rick
Email Address []:sysadmin@foo.wan

Next, issue the remaining commands.

# mv smtpd.key /etc/ssl/private/
# mv smtpd.crt /etc/ssl/certs/
# mv cakey.pem /etc/ssl/private/
# mv cacert.pem /etc/ssl/certs/

Then press ctrl-D to logout the root account.

Whew! We’ll continue by configuring Posfix to do TLS encryption for both incoming and outgoing mail (even though we’re only planning on sending mail at this point).

Configure Postfix to Do TLS Encryption

As earlier, sudo yourself to root and logout from root when finished.

$ sudo -i
# postconf -e 'smtpd_tls_auth_only = no'
# postconf -e 'smtp_use_tls = yes'
# postconf -e 'smtpd_use_tls = yes'
# postconf -e 'smtp_tls_note_starttls_offer = yes'
# postconf -e 'smtpd_tls_key_file = /etc/ssl/private/smtpd.key'
# postconf -e 'smtpd_tls_cert_file = /etc/ssl/certs/smtpd.crt'
# postconf -e 'smtpd_tls_CAfile = /etc/ssl/certs/cacert.pem'
# postconf -e 'smtpd_tls_loglevel = 1'
# postconf -e 'smtpd_tls_received_header = yes'
# postconf -e 'smtpd_tls_session_cache_timeout = 3600s'
# postconf -e 'tls_random_source = dev:/dev/urandom'

This next configuration command sets the host name, and this one uses my example machine’s host name. You should use your own instead.

# postconf -e 'myhostname = foo.wan'

Then press ctrl-D to logout the root account.

The postfix initial configuration is complete. Run the following command to start the Postfix daemon:

$ sudo /etc/init.d/postfix start

The Postfix daemon is now installed, configured and runing. Postfix supports SMTP AUTH as defined in RFC2554. It is based on SASL. It is still necessary to set up SASL authentication before you can use SMTP.

Setting Up SASL Authentication

The libsasl2-2 package is most likely already installed. If you’re not sure and want to try to install it you can, no harm will occur. Otherwise skip this command and simply continue.

$ sudo apt-get install libsasl2-2

Let’s continue the SASL configuration.

$ sudo mkdir -p /var/spool/postfix/var/run/saslauthd
$ sudo rm -rf /var/run/saslauthd

Create the file /etc/default/saslauthd.

$ sudo touch /etc/default/saslauthd

Use your favorite editor to edit the new file so that it contains the lines which follow. Just to be clear, the final line to add begins with “MECHANISMS=“.

# This needs to be uncommented before saslauthd will be run
# automatically
START=yes

PWDIR="/var/spool/postfix/var/run/saslauthd"
PARAMS="-m ${PWDIR}"
PIDFILE="${PWDIR}/saslauthd.pid"

# You must specify the authentication mechanisms you wish to use.
# This defaults to "pam" for PAM support, but may also include
# "shadow" or "sasldb", like this:
# MECHANISMS="pam shadow"

MECHANISMS="pam"

Save the file.

Next, update the dpkg state of /var/spool/portfix/var/run/saslauthd. The saslauthd init script uses this setting to create the missing directory with the appropriate permissions and ownership. As earlier, sudo yourself to root and logout from root when finished. Be careful, that’s another rather long command that may have wrapped on your display.

$ sudo -i
# dpkg-statoverride --force --update --add root sasl 755 /var/spool/postfix/var/run/saslauthd

Then press ctrl-D to logout the root account.

Test using telnet to connect to the running Postfix mail server and see if SMTP-AUTH and TLS are working properly.

$ telnet foo.wan 25

After you have established the connection to the postfix mail server, type this (substituting your server for mine, of course):

ehlo foo.wan

If you see the following lines (among others) then everything is working perfectly.

250-STARTTLS
250-AUTH LOGIN PLAIN
250-AUTH=LOGIN PLAIN
250 8BITMIME

Close the connection and exit telnet with this command.

quit

We’re almost there, promise.

Setting External SMTP Server Credentials

Remember, we set out to use an external Internet-connected SMTP server as a mail relay and this is how that is set up. I mentioned at the beginning of the article that I had set up a dedicated account on one of my domains. You might use one on your ISP. I would not, however, use your usual email account.

You’ll need to manually edit the /etc/postfix/main.cf file to add these lines:

smtp_sasl_auth_enable = yes
smtp_sasl_security_options = noanonymous
smtp_sasl_password_maps = hash:/etc/postfix/saslpasswd
smtp_always_send_ehlo = yes
relayhost = [mail.example.com]:1212

Of course, you’ll modify the relayhost = line to specify your external SMTP server. If you don’t need a port number then simply leave off the colon and port number following the closing bracket. I included the port number as a syntax example in case you needed to use one.

Did you notice the hash file mentioned in the lines you just added to/etc/postfix/main.cf? It holds the SMPT server logon credentials, and it’s time to create it.

$ sudo touch /etc/postfix/saslpasswd

Use your favorite editor to edit the file, adding the credentials with a line like this:

mail.example.com username@example.com:yourpassword

The components of the line you’re putting in the new file should be obvious.

(Before you cry foul… Yes, I’m well aware of the risk of storing credentials in the clear. It’s a manageable risk to me in this case for the following reasons. The physical machine is under my personal physical control. The credentials are dedicated to this single purpose. If the server becomes compromised I can disable the credentials from anywhere in the world I can obtain an Internet connection. If I’m dead and can’t do that, well, I guess it’s SEP and my incremental contribution to the SPAM of the world will torment my soul until the end of time. Your situation may be different and I leave it to you to secure the credentials.)

Anyway, before postfix can use that horribly insecure file it needs to be hashed by postmap:

$ sudo postmap /etc/postfix/saslpasswd

With that done, restart postfix.

$ sudo /etc/init.d/postfix restart

Applications that know how will now be able to generate mail but it’ll be convenient to be able to do it from the command line. Besides making testing of this configuration easier you’ll then be able to have your own scripts send messages with ease. For that you’ll need just one more package.

Installing the mailutils Package

Simple. Install the mailutils package.

$ sudo apt-get install mailutils

That’s it!

Try test sending some email from the command line. Substitute the address at which you usually receive mail for my example youraddress@yourserver.com.

$ echo "body: outbound email test" | mail -s "Test Subject" youraddress@yourserver.com

Check your inbox.

Wrapping Up

Well, that wasn’t so bad.

VirtualBox on the 64-bit Ubuntu Server 10.10

I recently set out to upgrade a virtual host server from VMware Server to Oracle’s VirtualBox. The upgrade was a huge success. This is one of several articles where I talk about various aspects of that upgrade, hopefully helping others along the way. You might want to go back and read the introductory article Virtualization Revisited.

Installing Ubuntu Server 10.10 is very fast and straightforward – maybe 10 minutes tops. There’s no shortage of coverage of the install procedure so I won’t bother with it again.

But in case you’re not familiar, I’ll mention that the Ubuntu installer will offer to configure the server with a selection of packages right off the bat. Like many others, I prefer to do those configurations myself in order to tailor the instance exactly to my needs. I make an exception with Open SSH so I that can reach the server from the comfort of my desk by the time it’s booted itself for the first time.

So let’s assume you’ve just finished the IPL, popped the install media, booted for the first time and logged in. The very first thing to do is catch up on any pending updates.

$ sudo apt-get update
$ sudo apt-get upgrade

For the sake of completeness, if anything is shown as kept back you should probably do a distribution upgrade followed by a reboot. If not, skip ahead.

$ sudo apt-get dist-upgrade
$ sudo shutdown -r now

Next I install Lugaru’s epsilon editor, a very capable emacs-like editor that I run on all my boxes. Believe me: there’s great value in having one editor that behaves in exactly the same way no matter what keyboard’s under your fingers! I’ve been a Lugaru customer since the 80s and I’m pleased to recommend their rock-solid product. Go test fly their unrestricted trial-ware. Anyway, the epsilon installation needs to build a few things and installing this bit first allows that (as well as other routine software builds that might be needed in the future) to simply happen.

$ sudo apt-get install build-essential

To The Business At Hand: Installing VirtualBox

Download the key and register the repository for VirtualBox. The key has changed recently, so what you see here might be different from other articles.

$ wget -q http://download.virtualbox.org/virtualbox/debian/oracle_vbox.asc -O- | sudo apt-key add -

The key fingerprint is

7B0F AB3A 13B9 0743 5925 D9C9 5442 2A4B 98AB 5139
Oracle Corporation (VirtualBox archive signing key) info@virtualbox.org

Edit the file /etc/apt/sources.list to add the following lines, which simply adds the appropriate repository.

# VirtualBox 3.2.10 VirtualBox for Ubuntu 10.10 Maverick Meerkat
deb http://download.virtualbox.org/virtualbox/debian maverick non-free

Make your system aware of the newly added repository.

$ sudo apt-get update
$ sudo apt-get upgrade

Now you’re ready for the actual VirtualBox install.

$ sudo apt-get install virtualbox-3.2

Finally, add any users that will need to run VirtualBox to the vboxusers group.

Don’t forget the -a flag in the command! This is especially important if you’re manipulating your administrator account. (The flag indicates that the group should be added to the the account, rather than replacing any/all existing groups.)

$ sudo usermod -a -G vboxusers <username>

And that’s all there is to it!

[ed. Appended later…]

There have been a couple of comments in email about networking setup. “You must not be making your VMs visible to your LAN. There’s nothing mentioned about bridge adapters…”

In fact I am using bridged adapters in my VMs! Last time I looked at VirtualBox it was quite the pain to set up that way. When I came to that part I just gave it a WTF and tried to simply bridge eth0. It works just fine!

Thanks for asking.

Virtualization Revisited

I’ve been virtualizing machines the home network for many years. The benefits are simply huge (but relax – I’ll not go into them in detail here). Suffice it to say that it beats the snot out of stack of old PCs with their attendant noise and energy consumption.

The server I built on a shoestring one August afternoon many years ago has (ahem) served us well. A mile-high overview of the hardware includes an NVIDEA motherboard from BFG, several GB of commodity RAM, a SATA RAID card from Silicon Image driving a handful of 3.5-inch SATA drives, and an IDE boot drive. The mini-tower case – told you I cheaped out – is somewhat dense inside so there are extra fans to keep the heat in check. The host OS has been Windows 2000 Server Service Pack 4.

Yeah, yeah, I know. It’s a 32-bit OS on 64-bit hardware. A nice chunk of RAM is ‘lost’ to insufficient address space right off the bat. I figured to upgrade the OS one day but never quite got around to it. The virtualization software is VMware Server, which I’ve been using since the beginning. Their current version is 2.0.0 Build 116503 (wow, 2008, when dinosaurs roamed the Earth). The guest OSs are a mix of Linux and Windows servers handling core dedicated roles as well as a changing mix of experimental/test/research stuff: DOS, Windows 3.1, Chrome OS, OS/2 Warp (OMG what a hack that was!), a couple of OTS appliances, more. What can I say? I’ve got an interest in history. Besides, the look on my kid’s face when he sees an ancient OS actually running (as opposed to just static screen shots on some Web page) is worth it.

Anyway, there are lots of problems with this setup. VMware Server, their free product, is getting long in the tooth. The Web-based interface doesn’t work with the Chrome browser; it’s one of the few things that continues to force me to use IE. Sometimes the service side of the interface goes MIA altogether. The 32-bit Win2K is finally hopelessly out of date, absolutely no more updates. The list goes on and on.

So every now and again I look around for alternatives. The last serious contender was VMware’s ESXi. The idea of a supported bare-metal virtualization platform sure sounded appealing! I spent a day or two experimenting but ended up dismissing it. Getting it to run on the (albeit weak) hardware proved do-able but not without difficulties. In the end it just seemed too fragile for the long-term. I chalked it up to more trouble than it was worth, restored the old setup and got on with life.

The October 2010 issue of Communications of the ACM carried an interesting article, Difference Engine: Harnessing Memory Redundancy in Virtual Machines. Excellent article! A side effect of reading it led me to think again about the clunky mess humming away in the basement. And it was at roughly that time when another interesting article came through the news flow, How do I add a second drive to a Windows XP virtual machine running in VirtualBox? [link is dead]

Hmmm, VirtualBox. I had looked at VirtualBox a long time ago. I grabbed a current release and installed it on my desktop. Wow, it’s apparently matured a great deal since I last paid attention! I found it intuitive and fast to not only create and use new guests but also to simply import and run my existing VMs. (Well, okay, so there were a few gotchas, but no showstoppers.) Yes, this could be a contender for the basement server!

I pulled out an old laptop for some preliminary testing. I loaded it up with Ubuntu Server 10.10, installed VirtualBox and parked it in the basement. The goal? Well, VirtualBox is very easy to control through its GUI but I’d need to learn to run it entirely via command line and build my confidence for a smooth migration. I just  knew I’d run into problems along the way – nothing’s ever as easy as it looks at first glance – and I wanted to be able to anticipate and solve most of them in advance.

As usual, the ‘net came through as a truly incredible learning resource and I made copious use of it along the way. But every situation is different. By documenting my work in a series of articles, well, maybe it’ll help some wayward soul have an easier time of it.