Tag Archives: upgrade

Windows 10 Upgrade – Follow-Up #1

I planned to follow-up the first article after about a week but you know how that goes sometimes…

New oddity with Windows 10. Since it has to do with wi-fi connectivity it could be vitally important for some, so here goes.

Basically, IPv6 works perfectly but IPv4 does not – at least not completely, and at least not for me. In the context of the web, it means that any site that’s IPv4-only becomes pretty much unreachable. That’s a lot of the web!

Here’s how I discovered it. I’ve had wire line phone trouble over the past few days. Interestingly (and thankfully!) my ADSL (1 pair of 2 coming into my home) remained fine while my dial tone went away. The voice pair indicated itself as permanently in-use and the pair at the demarc, when I tested, indicated reverse polarity. Today a tech came out, verified that the problem was on their end, and went to work.

He disconnected me out at the pedestal while he worked so I figured I’d simply use my smartphone’s hotspot. I use the feature often enough because it speeds my Internet connection by a factor of 35 or so over my wired ADSL connection. But this was the first time I needed to use it since Porky’s Windows 10 upgrade.

The hotspot connected straight away. I pointed my browser at the host I was working on and it reported ‘no connection’. I gave Google a quick ping and it answered – with its IPv6 address. I gave my target host a ping and it didn’t answer at all. I forced an IPv4 ping to Google (using ping’s -4 flag) and it, too, refused to answer.

I probed Porky’s network configuration for a while but haven’t come up with anything definitive yet. Until I do, the Windows 10 upgrade for the TwoFace2, our Surface Pro, is off the table. We use that little box often when we’re out and about at client sites and stuff, getting Internet through our smartphones when we do. Having that not work, or work only with IPv6 hosts, is not an option.

Oh, and if you’re wondering, the tech located two separate problems (!) with my voice pair between here and the CO, some 12,000+ feet away. (“Probably all this rain,” he said, “or maybe squirrels. Kill ’em if you see ’em, okay?”) He said he reassigned me a clean pair which restored my dial tone. I resisted the temptation to bitch about their antique DSLAM and just thanked him instead.

Shortly afterward the skies opened up. It’s the rainy season, after all.

Windows 10 Upgrade

Like millions of others, I’ve been running Windows 10 in a non-production environment for months and months. Mostly on virtual machines, the experience has been… pretty good!

But all the playing in the world is no substitute for a live update to a production OS running a production application load. Here are my experiences with Porky, my work-a-day desktop. Porky’s no slouch in the performance department. As we like to say sometimes, your mileage may vary.Windows 10 logo

Getting Ready
For those wanting to jump right in Microsoft has provided a Media Creation Tool. The tool handles the download for your chosen Windows 10 version and produces either an ISO file or a bootable USB thumb drive. I initially chose both 32-bit and 64-bit Windows 10 Pro versions and elected to produce an ISO file. To my dismay, the result was a file that’s too big to burn to DVD. Bummer, intermediate files are cleared when you finish with the tool so I couldn’t simply make the bootable USB stick without another lengthy download. The moral is that unless you enjoy a blazing, unmetered Internet connection, choose carefully when running the tool.

Use the resulting ISO or USB stick to either upgrade OR do a clean install. This is important: to upgrade your license key and activate Windows 10 you must UPGRADE your already installed, qualified Windows version FIRST. Do that by running Setup from the media. After you’ve upgraded and activated, if you wish, you can use the same media to do a clean install by booting it. Activate your clean install using your upgraded license key.

The remain preparation was simple. Over the past week or so I’ve reviewed applications, drivers, and so on, and upgrading/updating where necessary. And just before I imaged the boot drive. I verified and tested the image. Then I backed up Porky’s data drive array to an external drive. If Windows 10 left a smoking hole in my floor my data would still be safe.

Upgrade Duration
The upgrade took a while, which was a surprise. Not counting the download over my coffee-stirrer of an Internet pipe, upgrading my test environments – and the releases came hot-and-heavy toward the end – took only tens of minutes. Porky, by contrast, took well over an hour to complete. What’s more, there were a few periods of inactivity where progress appeared to stop altogether. If I had less patience I might have bailed. Instead I rode it out. Eventually a desktop appeared, sorta.

What’s this? VGA?
Porky settled into its first Windows 10 desktop in VGA mode, using only one monitor! The screaming fan of the mid-range Nvidia card was the clue and Device Manager confirmed that Microsoft had inserted their own generic display driver. A 280+ MB download from Nvidia plus a bit of fiddling fixed that.

Sleep
It was getting pretty late; the sun would be up soon. Even though Porky’s cold starts are lightning fast I use S3 sleep for a week or so at a time, which makes starts near instantaneous. Bump the mouse and it’s ready to work by the time my ass hits the chair. So that’s what I did in Windows 10.

When I returned to the office, coffee in hand, Porky was awake. Fans were screaming (not a good sign), the keyboard backlight was dark, and both keyboard and mouse were unresponsive. I leaned on the power button and Porky went down hard. I counted ten and powered up.

What the??? It was almost as though S3 sleep had worked after all!

Something’s flakey with recovering from the S3 low-power state. I’m not sure what. But I’ll be cold starting Porky until I get it sorted.

Start
I’m already used to the new Start menu, but that didn’t prepare me for the devastation the upgrade would bring. I’ve used the non-desktop, tiled interface in windows 8.1 as nothing more than an application launcher. I grouped my typical application loads together and my scroll finger had learned to horizontally move to the correct group. Finding things was easy!

The new Start menu seemed to have been filled by madmen on drugs. Finding stuff will be a pain in the ass until I could get organized. And sometimes, stuff just seemed to be missing altogether…

Missing Applications?
SmartFTP was the first of the missing. After confirming that it was still installed I ran a Repair sequence with its installer to bring it back. The installer complained, leaving a blank desktop in its wake. Via Task Manager I ran explorer.exe to get it back. The SmartFTP client runs, but it’s got some visual artifacts and the interface has some glitches. I guess the vendor will be updating that sucker pretty soon.

Have other applications fallen off the Start menu? Dunno, time will tell.

email
It’s no secret that I’m a heavy user of the venerable Eudora email client. It worked great in my test environments so I expected no problems. One click and the mail flowed.

Eudora hasn’t been maintained in nearly a decade. Kudos to its development team. The old girl lives on!

The first email check of the day usually brings me a bunch of stuff to do so I busied myself with that.

Performance
Microsoft has managed to do it again. I said before: Porky’s no slouch. Yet every (modern) Windows upgrade - 7 to 7SP1 to 8 to 8.1 to 8.1 Upgrade 1 to (now) 10 – has brought a noticeable performance boost. I’ll take it.

Other Weirdnesses
I’m only mentioning  odd stuff I notice. If I don’t mention it here then either I don’t use it or it seems okay.

SmartFTP I covered earlier.

Microsoft Word put itself through a series of gyrations with dialogues popping up and going away faster than they could be read. But that was just once. Thereafter it launched just fine. This was version 2010, by the way. I’ve seen no compelling reason to upgrade Office.

Adobe Acrobat 9 Pro Extended requested a Repair process when first launched. It took a while and asked for a reboot afterward. This is version 9, by the way. Acrobat’s expensive and this one works for me. The Repair sequence, available from the Help menu, took care of it. I can remember needing to do this before but can’t remember when or why, and I’m too lazy to search the system notebooks.

Cold starts will sometimes fail to load the driver for the Ethernet hardware on my motherboard. Porky’s cabled directly to my router through 1 of 2 available Ethernet ports on my motherboard. The port in use identifies itself as an Intel I210. The driver identifies itself as an Intel driver version 12.12.50.6. Near as I can tell, this is the latest and greatest, the Intel site shows nothing newer for Windows 10. The problem shows as a ‘no network’ condition, in Network Connections the adapter shows as Disabled and won’t Enable. In Device Manager, Update Driver Software finds a local driver, loads it, and the connection sets itself up straight away.

Conclusion
So far, this is less than a half day of experience following my Windows 10 upgrade. A few inconveniences, no showstoppers. I have yet to exercise the new stuff. This article is basically in the name of remaining productive, to help you decide whether to go ahead with your upgrade or wait it out a little.

Typos, bad grammar, and all that crap are my own. In the interest of speed, hey, you get what you pay for.

SSD

When I built Whisky, my current work-a-day desktop, back in November 2009 I wanted to boot from one of those blazin’ solid-state drives. Bummer, though, either they were seriously expensive or performed poorly. Poorly, of course, was a relative term; for the most part even the poorest smoke conventional hard drives. Still, as the build expenses mounted the SSD finally fell off the spec list.

Sometime after the build, Seagate brought their hybrid drives to market. Hybrids combine a conventional spinning disk and conventional cache with a few gigabytes of SLC NAND memory configured as a small SSD. The system sees the drive as it would any other drive; an Adaptive Memory (Seagate proprietary) algorithm monitors data use and keeps frequently used stuff on the SSD. You’ll find people arguing over whether or not a hybrid drive provides any kind of performance boost. I wrote about my experiences with the Seagate Momentus XT (ST95005620AS) back in June 2010. Today when I build a multiple drive system I routinely spec a hybrid as a boot drive. It’s cheap and it helps.

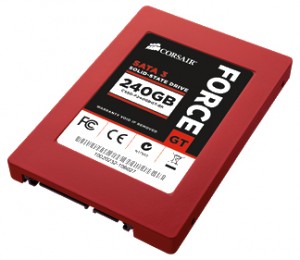
Corsair Force Series GT CSSD-F240GBGT-BKSo about a month ago I ran across a good deal on a fast SSD, a Corsair Force Series GT (CSSD-F240GBGT-BK) and I jumped on it. The specs are just tits: sequential reads and writes of 555 and 525 MB/s respectively. (Sure, that was with a SATA 3 interface and my motherboard only supports SATA 2; I wouldn’t see numbers like that, but still… It even looks great.

Integrating the thing into a working system was a bit of a challenge, mostly because I didn’t want to purchase additional software simply to clone the existing boot drive. I’ve got no trouble paying for software I use; it simply seemed like too much for something to be used but once. So part of the challenge was to find a cost-free alternative.

Strategy and Concerns

The general strategy would be to clone the current two-partition boot drive to the SSD, swap it in and enjoy the performance boost. The SSD partitions would need to be aligned, of course, and somewhere along the way the C partition would need to shrink to fit onto the smaller SSD.

The top concerns came down to security and reliability. Erasing a conventional hard drive is easy: repeatedly write random data to each block. You can’t do that with SSDs. Their blocks have a specific (and comparatively short) lifetime and so on-board wear-leveling routines become important. When data is overwritten, for example, the drive writes the data elsewhere and marks the old blocks for reuse. And unlike conventional drives, it’s not enough to simply write over a block marked for reuse; the entire block must first be erased. The bottom line is you can’t ever know with certainty whether or not a SSD is ever clear of confidential data. Disposing of them securely, then, means total destruction.

As for reliability, a conventional hard drive has to have some pretty serious problems before it becomes impossible to recover at least some data. There’s generally a bit of warning – they get noisy, start throwing errors, or something else that you notice – before they fail completely. Most often an SSD will simply fail. From working to not, just like that. And when that happens there’s not much to be done. This makes the issue of backups a little more thorny. If it contained confidential data at the time of failure you’ve got a hard choice to make: eat the cost and destroy the device, or RMA it back to the manufacturer (losing control of your data).

Considering backups, you can see that monolithic backups aren’t the best solution because they’re outdated as soon as they’re written. Instead, a continuous backup application, one that notices and writes changed files, with versioning, seems prudent.

In my case, this is to be a Windows 7 boot drive and and all confidential user data is already on other storage. The Force Series GT drive has a 2,000,000 hour MTBF, fairly high.

Software

SSDs are fast but they’re relatively small. It’s almost certain that existing boot partitions will be too big to fit and mine is no exception. Windows 7 Disk Manager will allow you to resize partitions if the conditions on those partitions are exactly right. There are commercial programs that will do the job where Windows won’t but my favorite is MiniTool Partition Wizard. I didn’t really want to do that in this instance. The fundamental problem I had with pre-shrinking is that it would involve mucking with a nicely working system. Come trouble, I wanted to simply pop my original drive back in the system, boot and get back to work.

For cloning and shrinking partitions there are several free or almost free applications. I found that most of them have drawbacks of one sort or another. I’ve used Acronis before – Acronis supplies OEM versions of their True Image software to some drive manufacturers, it’s an excellent product. But their free product won’t resize a partition image, bummer. I used EaseUS some years back, too, but a bad run-in once with their “rescue media” – in that case a bootable USB stick. My disks got hosed pretty bad from simply booting the thing and I… wasn’t pleased. Maybe they’ve gotten better, people say good things about ’em, but I wasn’t confident… Paragon seemed very highly rated but in testing I had too many validation failures with their images. Apparently the current version is worse than the back revs. Whatever, I was still uneasy. I ended up settling on Macrium Reflect from Paramount Software UK Ltd. For no rational reason the name of this product bothered me, sending it to the bottom of the test list. Macrium. The word makes me think of death by fire. I was reluctant to even install it. About the only negative think I’ve got to say about Macrium is that it takes a fair bit of effort to build the ‘rescue disk’ – bootable media to allow you to rebuild a failed boot volume from your backup image(s). The rescue media builder downloads and installs, from a Microsoft site, the Windows Automated Installation Kit. WAIK weighs in at more than 2 GB. The end result is a small ISO from which you can make bootable media of your choice. Except for that final burn – you’re on your own for that – the process is mostly automated; it just takes a while. Probably has to do with licensing or something.

Finally, I bought a copy of Genie Timeline Pro to provide the day-to-day realtime backup insurance, mentioned earlier, that I wanted.

Preparation for Migration

I started by installing both Gene Timeline Pro and Macrium Reflect and familiarized myself with each. I built the rescue media for each, booted from the media, and restored stuff to a spare drive in order to test. It’s an important step that many omit, but a backup that doesn’t work, for whatever reason, is worse than no backup at all.

I did some additional maintenance and configuration which would affect the C: partition. I disabled indexing and shrunk the page file to 2GB. The box has 8GB RAM and never pages. I suppose I could omit the page file entirely, but a warning is better than a BSOD for failure to page. I got rid of all the temp junk and performed the usual tune-up steps that Windows continues to need from time to time.

Satisfied, I imaged the System Reserved partition and the C: partition of my boot volume, verifying the images afterward. For each partition, which I backed up with separate operations, I used the Advanced Settings in Macrium Reflect to make an Intelligent Sector copy. This means that unused sectors aren’t copied, effectively shrinking the images. Then I installed the SSD via an eSATA port. Yes, this meant it would run even slower than SATA 2 but it saved a trip inside the box.

It was at this step that I noticed the only negative thing about this drive. The SATA cable is a bit of a loose fit. It doesn’t accept a retaining clip, if your cable is so equipped. Ensure there’s no tension on a cable that might dislodge it.

Creating Aligned Partitions

Partition alignment is important on SSDs both for performance and long life. Because of the way they work, most will read and write 4K pages. A very simplistic explanation is that when a partition is not aligned on a 4K boundary, most writes will require two pages rather than one which decreases performance dramatically and wears the memory faster. (There’s more to it than that, really, but you can seek that out on your own. The Web’s a great teacher. Being the curious sort I learned more than I needed to.)  Windows 7, when IPLed, will notice the SSD and build correctly aligned partitions for you. Some commercial disk cloning software will handle it automatically, too. But migrating users are on their own. Incidentally, it’s theoretically possible to adjust partition alignment on the fly, but if you think about the logistics of how this might be done – shifting an entire partition this way or that by some number of 512 byte blocks to a 4K boundary – you’ll realize it’s more trouble than it’s worth. Better to simply get it right in the first place.

Fortunately it’s easy!

Using an elevated command prompt (or, in my case, a PowerShell), use DISKPART. In my case, my existing System Reserved partition was 71 MB and change, and the remainder of the SSD would become my C: partition.

diskpart
list disk
select disk <n>
(where <n>is the disk number of the SSD)
create partition primary size=72 align=1024
active
(the System Reserved partition needs to be Active)
create partition primary align=1024
(no size specification means use the remaining available space)
exit

You can also use DISKPART to check the alignment. I’ll use mine as an example.

diskpart
list disk
select disk <n>
(where <n>is the disk number of the SSD)
list partition
exit

My partition list looks like this.

Partition ### Type             Size    Offset
------------- ---------------- ------- -------
Partition 1   Primary           70 MB 1024 KB
Partition 2   Primary          223 GB   73 MB

To check the alignment, divide the figure in the Offset column, expressed in kilobytes, by 4. If it divides evenly then it’s aligned. For Partition 1, the System Reserved partition, 1024 / 4 = 256, so it’s good. Partition 2’s Offset is expressed in megabytes so we have to convert to kilobytes first by multiplying it by 1024. So, 73 * 1024 = 74752 and 74752 / 4 = 18688, so it’s good, too.

Whew!

It’s worth noting that what DISKPART didn’t show in the list is the tiny unused space – about 2MB in my case – between Partition 1 and Partition 2 which facilitated alignment.

Someone pointed out to me that partition alignment can be checked without DISKPART. Fire up msinfo32. Expand Components, then expand Storage, then select Disks. Find the drive in question and divide the Partition Starting Offset fields by 4096. If it divides evenly you’re all set!

Migration

I used Macrium Reflect to restore the partition images I created earlier. Rather than allowing the software to create the partitions (which would negate our alignment effort) I pointed it to each target partition in turn. When the restore was finished I shut the system down.

I pulled the SSD from the eSATA port and pulled the existing boot drive from the system. I mounted the SSD in place of the old boot drive. (Windows gets upset when it finds multiple boot drives at startup, so it’s a good idea to have just one.) I took extra care with the data cable.

I powered up and entered the system BIOS, walked through the settings applicable to a drive change, saved and booted.  Things looked good.

Living With the SSD

Wow! Coldstarts are fast. (See below.) So fast that getting through the BIOS has become the perceived bottleneck. Applications start like lightning, especially the first time, before Windows caches them. Shutdowns are snappy, too. (See below.) There’s no shortage of anecdotes and benchmarks on the ‘net and I’m sure you’ve seen them. It’s all delightfully true.

But all wasn’t perfect. After a week or two some new patterns seemed to be emerging.

Every so often, unexpectedly, the system would become unresponsive with the drive use LED full-on solid, for some tens of seconds. Most of the time the system would return to normal operation but depending on what application was doing what at the time, the period of unresponsiveness could sometimes cause a crash. Sometimes the crash would be severe enough to bring on a BSOD. The biggest problem I have with BSODs or other hard crashes is that it causes the mirrored terabyte data drives to resync, and that takes a while. Usually the System Log would show Event ID 11 entries like this associated with the event:

The driver detected a controller error on \Device\Ide\IdePort6.

And once, following a BSOD, the boot drive was invisible to the BIOS at restart! A hard power cycle made it visible again and Whisky booted normally, as though nothing abnormal had ever occurred.

Hard to say for sure, but it seemed as though these oddities were happening with increasing frequency.

Firmware Update

Prowling the ‘net I found others reporting similar problems. What’s more, Corsair was on the case and had a fresh firmware update! The update process, they claimed, was supposed to preserve data. I checked my live backup and made new partition images anyway. The drive firmware update itself went exactly as described, took but seconds and left the data intact. The next boot had Windows installing new (or maybe just reinstalling?) device drivers for the drive, which then called for another boot. All this booting used to be a pain in the ass but when the box boots in seconds you tend to not mind that much.

Benchmark performance after the update was improved, but only marginally – nothing I’d actually notice. The troublesome hangs I mentioned seem to occur on bootup now, when they occur at all. They seem less ‘dangerous’ because they don’t interrupt work in progress at that time. So far, anyway, I just wait out the length boot and log in, followed by a cold shutdown. The next coldstart invariably goes normally, that is, very, very fast.

What’s going on? Maybe some periodic housekeeping going on in the drive? Maybe some housekeeping that was underway when I interrupted with a shutdown? Or maybe it’s that data cable? Remember, I mentioned it’s sort of a loose fit without a retainer clip. Time will tell.

Videos

I goes without saying that SSDs are fast. Many people like to judge that by how fast Windows loads. I threw together a couple of videos to illustrate.

System Startup with SSD
00.00 - Sequence start
01.30 - Power on
04.06 - Hardware initialization
13.20 - Video signal to monitors
15.83 - BIOS
23.93 - Windows Startup
39.83 - Login prompt
44.93 - Password entry complete
54.50 - Ready to work

Power on to Windows startup duration is 22.63 seconds.
Windows startup to login prompt duration is 15.90 seconds.
Password entry to ready-to-work duration is 9.57 seconds.


System Shutdown with SSD

00:00:00 - Sequence start
00:08.32 - Shutdown initiated
00:24.27 - Shutdown complete

Shutdown initiation to power off duration: 15.95 seconds.


Supercharging the Stratocaster

I’ve got a Fender Stratocaster, one of the infamous “Splatter Stats“. Purely stock except for the strings, it’s always had a couple of quirks that I’ve wanted to address. It’s time.

I use Ernie Ball Super Slinky strings and the G string in particular has always sounded a bit on the dull side. It’s because of the way the string passes through the nut. One can brighten up the open string by dampening it a little between the nut and the tuning peg (but it’s inconvenient to play that way). I keep the tremolo bridge free-floating, which makes tuning somewhat more challenging. I don’t use the whammy bar but I sometimes ‘wobble’ the sound with my palm on the bridge. Once in tune it tends to stay in tune but lots of bendy work will tend to detune the bendy string. I chalk that one up to string friction.

Graph Tech makes what they call a Supercharger Kit that seemed like just the ticket. [addendum June 2013: Graph Tech has revised their product numbering and web site since this post was written. The link to the kit now points to the updated product. The biggest apparent difference is that my string trees are black with squared-off corners. They probably have a little more string contact.] [updated again November 2019: They’ve gone and changed their website again, so the link is updated. Here’s the part number I used: PN-8000-00] The kit includes a set of saddles, a replacement nut and nut blank, and string trees. The kit also includes an Allen key for setting string height, some emery paper for nut shaping, plus instructions. Oh, yeah, and a pick. You can read about their claimed benefits on their Web site.

The Graph Tech parts that contact strings are made of a material that promises to self-lubricate, leading to less string breakage according to their literature. I was hoping that by reducing friction, bends would return to original tune more consistently. Finally, others on the net had mentioned my preferred strings when discussing the Graph Tech nut. My shop isn’t equipped for cutting new nuts. I don’t want to invest in a set of seldom-used nut files so the closer I get to a stock nut the better.

The work is easy, but quite a bit of setup is necessary after swapping the parts around. If you’re not comfortable setting string heights and intonation then you’ll be better off having your tech do the work instead. If the setup is incorrect your instrument will sound bad. Very bad.

Mexican Splatter Stratocaster

Here’s my Strat on the floor ready for supercharging, using the kit of parts shown. You can click these images for a better look.

Stock saddles removed, new parts ready.

The stock saddles have been removed and the Graph Tech parts are ready for installation. The instructions tell you to remove the strings but I wanted to keep them a little longer; I only changed them a week ago. Since they were all loose, though, this was an excellent opportunity to clean the fretboard and other areas that aren’t often so fully exposed. (When I change strings I change them one at a time in order to keep the neck tension reasonably constant.) So these won’t be seated right and I expect setup will be harder that it would be with new strings. So it goes.

Graph Tech saddles installed.

Graph Tech saddles installed, though obviously not adjusted. Some say the black parts don’t look as good as the stock chrome but I disagree.

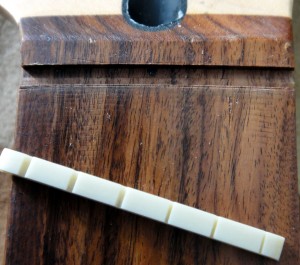
Stock nut removed.

The stock nut removed. I was ready for battle but mine literally fell out with a little bit of thumb pressure. Normally you’ll want to score the lacquer around the nut with a sharp Xacto blade so it doesn’t crack. This could explain why I’ve always felt the nut was just a tad low; the shop may have modified it before selling it. (Or, maybe what was sold as new was actually a return that had been set up?) According to the serial number, the guitar I bought August 14, 2004 was built in the Ensenada, Mexico plant in 2003-2004.

Stock and Graph Tech nuts.

Here are the stock and Graph Tech nuts. Note the tab on the Graph Tech – some Strats have a receiver for that tab and some don’t, I’m told. The string slots are not as deep. The new nut is a little longer than stock; I needed to remove the tab and shorten it a little, removing equal amounts of material from each side. It was easy do do using the emery included in the kit.

Tool setup for tab removal.

In the shop, a Dremel tool held by the rubber-jawed vise next to the lathe made the work of removing the tab easy. After the tab was removed, the thickness of the nut was reduced by hand to make for a snug fit in the nut slot. Then the bottom of the nut was reduced – by hand, a little bit at a time, tuning to pitch in between – to set the nut height. The supplied instructions give a good starting point but I set it a little on the high side. I’m conservative that way, figuring I can always lower the nut in the future. Raising the nut means ordering a new one and starting again.

Finished headstock.

The nut’s in place and you can see the new string trees as well. Yes, now there are two string trees! What’s not evident in the photo (my bad) is that the trees are different heights. The bottom one’s shorter and guides the high E and B strings – exactly like the stock tree. Graph Tech supplies a second, taller tree in the kit. I thought about it for a long time before placing it as I did. The additional tree guides the G string but isn’t low enough to touch the B string at all. I didn’t want the tree to touch the D string because I felt it would make the nut-to-tree angle too severe. I’m not sure how the extra tree will hold up long term, guiding only one string, but we’ll see. I drilled the pilot hole for the new screw with a 0.058-inch bit chucked in a hand drill.

Modifications complete.

Here’s the finished product. You can see the black replacement parts and the extra string tree. The setup and intonation are roughed in, good enough to start playing. I know me – it’ll a period of time of adjusting to get it just the way I like it – and I may need to further lower the nut – but so far it looks like a huge success!

The instrument tunes easier and stays in tune better despite long bends. The G string now rings true! The overall sound is decidedly different. The unamplified sound is louder and brighter. Amplified, you immediately notice the increased sustain.

Communicating With The Outside World

I recently set out to upgrade a virtual host server from VMware Server to Oracle’s VirtualBox. The upgrade was a huge success. This is one of several articles where I talk about various aspects of that upgrade, hopefully helping others along the way. You might want to go back and read the introductory article Virtualization Revisited. Added 5-May-2011: Originally written using Ubuntu Server 10.04, this configuration also works without change on Ubuntu Server 11.04.

One of the things that I wanted from the new VM host was alerts for anomalous situations. Manually polling for trouble begins as a noble effort but trust me – after a while you’ll stop looking. About a year ago I was almost caught by a failing hard drive in a RAID array. Even after that incident, within a month or two I had pretty much stopped paying regular attention.

While setting up monitor/alert mechanisms on an old Windows server is quite the pain in the ass it’s a snap on Linux. Delivery of alerts and status reports via email is just perfect for me. All I wanted was the ability to have the system generate SMTP traffic; no messages would ever be received by the system. To prepare for that I set up a send-only email account to use the SMTP server on one of my domains solely for the VM host’s use as a mail relay. Then I got on with configuring Postfix, the standard Ubuntu mailer – one of several excellent sendmail alternatives.

Now maybe I’m just a dummy, but I found various aspects of the Postfix and related configurations to be a little tricky. Hence this article, which details what worked for me – and should work for you, too.

(In the stuff that follows, my example machine is named foo and it’s on an internal TLD called wan. My example machine’s system administrator account is sysadmin. My SMTP server is on mail.example.com listening on port 1212. The SMTP account is username with a password of yourpassword.)

Getting Started – Basic Configuration

Begin by installing Postfix, as you would any package.

$ sudo apt-get install postfix

For now, just hit Enter through the install questions. We’ll configure it properly following the install. You’ll be asked for the general type of mail configuration and Internet Site will be the default. Accept that by pressing Enter. You’ll be asked for the System mail name and something will probably be pre-filled. Accept that, too.

Now, go back and do a proper basic configuration.

$ sudo dpkg-reconfigure postfix

Several questions will follow. Here’s how to respond.

For the general type of mail configuration choose Internet Site.

Set the domain name for the machine. The panel provides a good explanation of what’s needed here, and chances are good that it’s pre-filled correctly. By example, foo.wan.

Provide the username of the system administrator. The panel provides a good explanation of what’s needed here. Use the name of the account that you specified when you installed Ubuntu. By example, sysadmin.

Provide a list of domains for which the machine should consider itself the final destination. The panel provides an OK explanation and it’s probably already pre-filled more-or-less correctly. But look carefully at the list that appears in the panel and edit it if it has obvious errors like extra commas. Again, using my example machine, a list like this is appropriate:

foo.wan, localhost.wan, localhost

You’ll be asked whether or not to force synchronous updates on the mail queue. Answer No, which is likely the default.

Next, specify the network blocks for which the host should relay mail. This entry is pre-filled based on the connected subnets. Unless you’ll be using an external SMTP server that requires it, you can simply remove all of the IPv6 stuff that appears here, leaving only the IPv4 entry which will probably look something like this:

127.0.0.0/8

Specify the mailbox size limit. The default is zero, meaning no limit. Accept that. Remember, all we’re planning to do is send mail, not receive it.

Set the character used to define a local address extension. The default is +. Accept it.

Choose the Internet protocols to use. Again, keeping with our earlier IPv4 decision select ipv4 from the list and accept it.

That’s it for the basic Postfix configuration! Next you’ll configure Postfix to do SMTP AUTH using SASL (saslauthd).

SMTP AUTH using SASL (saslauthd)

Since there are several commands to issue as root it’s convenient to sudo yourself as root to save some typing. Good practice dictates you should logout the root account just as soon as you’re finished.

Be careful. In this list of commands there is one – it sets smtpd_recipient_restrictions – that is quite long and may have wrapped on your display. Be sure to issue the entire command.

$ sudo -i
# postconf -e 'smtpd_sasl_local_domain ='
# postconf -e 'smtpd_sasl_auth_enable = yes'
# postconf -e 'smtpd_sasl_security_options = noanonymous'
# postconf -e 'broken_sasl_auth_clients = yes'
# postconf -e 'smtpd_recipient_restrictions = permit_sasl_authenticated,permit_mynetworks,reject_unauth_destination'
# postconf -e 'inet_interfaces = all'
# echo 'pwcheck_method: saslauthd' >> /etc/postfix/sasl/smtpd.conf
# echo 'mech_list: plain login' >> /etc/postfix/sasl/smtpd.conf

Then press ctrl-D to logout the root account.

The next step is to configure the digital certificate for TLS.

Configure the Digital Certificate for TLS

Some of the commands that follow will ask questions. Follow these instructions and answer appropriately, modifying your answers to suit your situation. As earlier, sudo yourself to root and logout from root when finished.

$ sudo -i
# openssl genrsa -des3 -rand /etc/hosts -out smtpd.key 1024

You’ll be asked for the smtpd.key passphrase. Enter one and remember it. You’ll need to type it twice, as is customary when creating credentials. Then continue.

# chmod 600 smtpd.key
# openssl req -new -key smtpd.key -out smtpd.csr

You’ll be asked for your smtpd.key passphrase. Enter it.

Next you’ll be asked a series of questions that will make up a Distinguished Name, which is incorporated into your certificate. There’s much you can leave blank by answering with a period only. Here’s a sample set of responses (underlined) based on my US location and example system.

Country Name (2 letter code) [AU]:US
State or Province Name (full name) [Some-State]:Texas
Locality Name (eg, city) []:.
Organization Name (eg, company) [Internet Widgits Pty Ltd]:.
Organizational Unit Name (eg, section) []:.
Common Name (eg, YOUR name) []:Rick
Email Address []:sysadmin@foo.wan
A challenge password []:some-challenge-password
An optional company name []:.

Then continue.

# openssl x509 -req -days 3650 -in smtpd.csr -signkey smtpd.key -out smtpd.crt

You’ll be prompted for your smtpd.key passphrase. Enter it.

Then continue.

# openssl rsa -in smtpd.key -out smtpd.key.unencrypted

You’ll be prompted for your smtpd.key passphrase. Enter it.

Then continue.

# mv -f smtpd.key.unencrypted smtpd.key
# openssl req -new -x509 -extensions v3_ca -keyout cakey.pem -out cacert.pem -days 3650

You’ll be asked for a PEM passphrase. Enter one and remember it. You’ll need to type it twice, as is customary when creating credentials.
Like earlier, you’ll be asked a series of questions that will make up a Distinguished Name, which is incorporated into your certificate. There’s much you can leave blank by answering with a period only. Here’s a sample set of responses (underlined) based on my US location and example system.

Country Name (2 letter code) [AU]:US
State or Province Name (full name) [Some-State]:Texas
Locality Name (eg, city) []:.
Organization Name (eg, company) [Internet Widgits Pty Ltd]:.
Organizational Unit Name (eg, section) []:.
Common Name (eg, YOUR name) []:Rick
Email Address []:sysadmin@foo.wan

Next, issue the remaining commands.

# mv smtpd.key /etc/ssl/private/
# mv smtpd.crt /etc/ssl/certs/
# mv cakey.pem /etc/ssl/private/
# mv cacert.pem /etc/ssl/certs/

Then press ctrl-D to logout the root account.

Whew! We’ll continue by configuring Posfix to do TLS encryption for both incoming and outgoing mail (even though we’re only planning on sending mail at this point).

Configure Postfix to Do TLS Encryption

As earlier, sudo yourself to root and logout from root when finished.

$ sudo -i
# postconf -e 'smtpd_tls_auth_only = no'
# postconf -e 'smtp_use_tls = yes'
# postconf -e 'smtpd_use_tls = yes'
# postconf -e 'smtp_tls_note_starttls_offer = yes'
# postconf -e 'smtpd_tls_key_file = /etc/ssl/private/smtpd.key'
# postconf -e 'smtpd_tls_cert_file = /etc/ssl/certs/smtpd.crt'
# postconf -e 'smtpd_tls_CAfile = /etc/ssl/certs/cacert.pem'
# postconf -e 'smtpd_tls_loglevel = 1'
# postconf -e 'smtpd_tls_received_header = yes'
# postconf -e 'smtpd_tls_session_cache_timeout = 3600s'
# postconf -e 'tls_random_source = dev:/dev/urandom'

This next configuration command sets the host name, and this one uses my example machine’s host name. You should use your own instead.

# postconf -e 'myhostname = foo.wan'

Then press ctrl-D to logout the root account.

The postfix initial configuration is complete. Run the following command to start the Postfix daemon:

$ sudo /etc/init.d/postfix start

The Postfix daemon is now installed, configured and runing. Postfix supports SMTP AUTH as defined in RFC2554. It is based on SASL. It is still necessary to set up SASL authentication before you can use SMTP.

Setting Up SASL Authentication

The libsasl2-2 package is most likely already installed. If you’re not sure and want to try to install it you can, no harm will occur. Otherwise skip this command and simply continue.

$ sudo apt-get install libsasl2-2

Let’s continue the SASL configuration.

$ sudo mkdir -p /var/spool/postfix/var/run/saslauthd
$ sudo rm -rf /var/run/saslauthd

Create the file /etc/default/saslauthd.

$ sudo touch /etc/default/saslauthd

Use your favorite editor to edit the new file so that it contains the lines which follow. Just to be clear, the final line to add begins with “MECHANISMS=“.

# This needs to be uncommented before saslauthd will be run
# automatically
START=yes

PWDIR="/var/spool/postfix/var/run/saslauthd"
PARAMS="-m ${PWDIR}"
PIDFILE="${PWDIR}/saslauthd.pid"

# You must specify the authentication mechanisms you wish to use.
# This defaults to "pam" for PAM support, but may also include
# "shadow" or "sasldb", like this:
# MECHANISMS="pam shadow"

MECHANISMS="pam"

Save the file.

Next, update the dpkg state of /var/spool/portfix/var/run/saslauthd. The saslauthd init script uses this setting to create the missing directory with the appropriate permissions and ownership. As earlier, sudo yourself to root and logout from root when finished. Be careful, that’s another rather long command that may have wrapped on your display.

$ sudo -i
# dpkg-statoverride --force --update --add root sasl 755 /var/spool/postfix/var/run/saslauthd

Then press ctrl-D to logout the root account.

Test using telnet to connect to the running Postfix mail server and see if SMTP-AUTH and TLS are working properly.

$ telnet foo.wan 25

After you have established the connection to the postfix mail server, type this (substituting your server for mine, of course):

ehlo foo.wan

If you see the following lines (among others) then everything is working perfectly.

250-STARTTLS
250-AUTH LOGIN PLAIN
250-AUTH=LOGIN PLAIN
250 8BITMIME

Close the connection and exit telnet with this command.

quit

We’re almost there, promise.

Setting External SMTP Server Credentials

Remember, we set out to use an external Internet-connected SMTP server as a mail relay and this is how that is set up. I mentioned at the beginning of the article that I had set up a dedicated account on one of my domains. You might use one on your ISP. I would not, however, use your usual email account.

You’ll need to manually edit the /etc/postfix/main.cf file to add these lines:

smtp_sasl_auth_enable = yes
smtp_sasl_security_options = noanonymous
smtp_sasl_password_maps = hash:/etc/postfix/saslpasswd
smtp_always_send_ehlo = yes
relayhost = [mail.example.com]:1212

Of course, you’ll modify the relayhost = line to specify your external SMTP server. If you don’t need a port number then simply leave off the colon and port number following the closing bracket. I included the port number as a syntax example in case you needed to use one.

Did you notice the hash file mentioned in the lines you just added to/etc/postfix/main.cf? It holds the SMPT server logon credentials, and it’s time to create it.

$ sudo touch /etc/postfix/saslpasswd

Use your favorite editor to edit the file, adding the credentials with a line like this:

mail.example.com username@example.com:yourpassword

The components of the line you’re putting in the new file should be obvious.

(Before you cry foul… Yes, I’m well aware of the risk of storing credentials in the clear. It’s a manageable risk to me in this case for the following reasons. The physical machine is under my personal physical control. The credentials are dedicated to this single purpose. If the server becomes compromised I can disable the credentials from anywhere in the world I can obtain an Internet connection. If I’m dead and can’t do that, well, I guess it’s SEP and my incremental contribution to the SPAM of the world will torment my soul until the end of time. Your situation may be different and I leave it to you to secure the credentials.)

Anyway, before postfix can use that horribly insecure file it needs to be hashed by postmap:

$ sudo postmap /etc/postfix/saslpasswd

With that done, restart postfix.

$ sudo /etc/init.d/postfix restart

Applications that know how will now be able to generate mail but it’ll be convenient to be able to do it from the command line. Besides making testing of this configuration easier you’ll then be able to have your own scripts send messages with ease. For that you’ll need just one more package.

Installing the mailutils Package

Simple. Install the mailutils package.

$ sudo apt-get install mailutils

That’s it!

Try test sending some email from the command line. Substitute the address at which you usually receive mail for my example youraddress@yourserver.com.

$ echo "body: outbound email test" | mail -s "Test Subject" youraddress@yourserver.com

Check your inbox.

Wrapping Up

Well, that wasn’t so bad.

VirtualBox on the 64-bit Ubuntu Server 10.10

I recently set out to upgrade a virtual host server from VMware Server to Oracle’s VirtualBox. The upgrade was a huge success. This is one of several articles where I talk about various aspects of that upgrade, hopefully helping others along the way. You might want to go back and read the introductory article Virtualization Revisited.

Installing Ubuntu Server 10.10 is very fast and straightforward – maybe 10 minutes tops. There’s no shortage of coverage of the install procedure so I won’t bother with it again.

But in case you’re not familiar, I’ll mention that the Ubuntu installer will offer to configure the server with a selection of packages right off the bat. Like many others, I prefer to do those configurations myself in order to tailor the instance exactly to my needs. I make an exception with Open SSH so I that can reach the server from the comfort of my desk by the time it’s booted itself for the first time.

So let’s assume you’ve just finished the IPL, popped the install media, booted for the first time and logged in. The very first thing to do is catch up on any pending updates.

$ sudo apt-get update
$ sudo apt-get upgrade

For the sake of completeness, if anything is shown as kept back you should probably do a distribution upgrade followed by a reboot. If not, skip ahead.

$ sudo apt-get dist-upgrade
$ sudo shutdown -r now

Next I install Lugaru’s epsilon editor, a very capable emacs-like editor that I run on all my boxes. Believe me: there’s great value in having one editor that behaves in exactly the same way no matter what keyboard’s under your fingers! I’ve been a Lugaru customer since the 80s and I’m pleased to recommend their rock-solid product. Go test fly their unrestricted trial-ware. Anyway, the epsilon installation needs to build a few things and installing this bit first allows that (as well as other routine software builds that might be needed in the future) to simply happen.

$ sudo apt-get install build-essential

To The Business At Hand: Installing VirtualBox

Download the key and register the repository for VirtualBox. The key has changed recently, so what you see here might be different from other articles.

$ wget -q http://download.virtualbox.org/virtualbox/debian/oracle_vbox.asc -O- | sudo apt-key add -

The key fingerprint is

7B0F AB3A 13B9 0743 5925 D9C9 5442 2A4B 98AB 5139
Oracle Corporation (VirtualBox archive signing key) info@virtualbox.org

Edit the file /etc/apt/sources.list to add the following lines, which simply adds the appropriate repository.

# VirtualBox 3.2.10 VirtualBox for Ubuntu 10.10 Maverick Meerkat
deb http://download.virtualbox.org/virtualbox/debian maverick non-free

Make your system aware of the newly added repository.

$ sudo apt-get update
$ sudo apt-get upgrade

Now you’re ready for the actual VirtualBox install.

$ sudo apt-get install virtualbox-3.2

Finally, add any users that will need to run VirtualBox to the vboxusers group.

Don’t forget the -a flag in the command! This is especially important if you’re manipulating your administrator account. (The flag indicates that the group should be added to the the account, rather than replacing any/all existing groups.)

$ sudo usermod -a -G vboxusers <username>

And that’s all there is to it!

[ed. Appended later…]

There have been a couple of comments in email about networking setup. “You must not be making your VMs visible to your LAN. There’s nothing mentioned about bridge adapters…”

In fact I am using bridged adapters in my VMs! Last time I looked at VirtualBox it was quite the pain to set up that way. When I came to that part I just gave it a WTF and tried to simply bridge eth0. It works just fine!

Thanks for asking.

Virtualization Revisited

I’ve been virtualizing machines the home network for many years. The benefits are simply huge (but relax – I’ll not go into them in detail here). Suffice it to say that it beats the snot out of stack of old PCs with their attendant noise and energy consumption.

The server I built on a shoestring one August afternoon many years ago has (ahem) served us well. A mile-high overview of the hardware includes an NVIDEA motherboard from BFG, several GB of commodity RAM, a SATA RAID card from Silicon Image driving a handful of 3.5-inch SATA drives, and an IDE boot drive. The mini-tower case – told you I cheaped out – is somewhat dense inside so there are extra fans to keep the heat in check. The host OS has been Windows 2000 Server Service Pack 4.

Yeah, yeah, I know. It’s a 32-bit OS on 64-bit hardware. A nice chunk of RAM is ‘lost’ to insufficient address space right off the bat. I figured to upgrade the OS one day but never quite got around to it. The virtualization software is VMware Server, which I’ve been using since the beginning. Their current version is 2.0.0 Build 116503 (wow, 2008, when dinosaurs roamed the Earth). The guest OSs are a mix of Linux and Windows servers handling core dedicated roles as well as a changing mix of experimental/test/research stuff: DOS, Windows 3.1, Chrome OS, OS/2 Warp (OMG what a hack that was!), a couple of OTS appliances, more. What can I say? I’ve got an interest in history. Besides, the look on my kid’s face when he sees an ancient OS actually running (as opposed to just static screen shots on some Web page) is worth it.

Anyway, there are lots of problems with this setup. VMware Server, their free product, is getting long in the tooth. The Web-based interface doesn’t work with the Chrome browser; it’s one of the few things that continues to force me to use IE. Sometimes the service side of the interface goes MIA altogether. The 32-bit Win2K is finally hopelessly out of date, absolutely no more updates. The list goes on and on.

So every now and again I look around for alternatives. The last serious contender was VMware’s ESXi. The idea of a supported bare-metal virtualization platform sure sounded appealing! I spent a day or two experimenting but ended up dismissing it. Getting it to run on the (albeit weak) hardware proved do-able but not without difficulties. In the end it just seemed too fragile for the long-term. I chalked it up to more trouble than it was worth, restored the old setup and got on with life.

The October 2010 issue of Communications of the ACM carried an interesting article, Difference Engine: Harnessing Memory Redundancy in Virtual Machines. Excellent article! A side effect of reading it led me to think again about the clunky mess humming away in the basement. And it was at roughly that time when another interesting article came through the news flow, How do I add a second drive to a Windows XP virtual machine running in VirtualBox? [link is dead]

Hmmm, VirtualBox. I had looked at VirtualBox a long time ago. I grabbed a current release and installed it on my desktop. Wow, it’s apparently matured a great deal since I last paid attention! I found it intuitive and fast to not only create and use new guests but also to simply import and run my existing VMs. (Well, okay, so there were a few gotchas, but no showstoppers.) Yes, this could be a contender for the basement server!

I pulled out an old laptop for some preliminary testing. I loaded it up with Ubuntu Server 10.10, installed VirtualBox and parked it in the basement. The goal? Well, VirtualBox is very easy to control through its GUI but I’d need to learn to run it entirely via command line and build my confidence for a smooth migration. I just  knew I’d run into problems along the way – nothing’s ever as easy as it looks at first glance – and I wanted to be able to anticipate and solve most of them in advance.

As usual, the ‘net came through as a truly incredible learning resource and I made copious use of it along the way. But every situation is different. By documenting my work in a series of articles, well, maybe it’ll help some wayward soul have an easier time of it.

Seagate Momentus XT Hybrid Drive

A few weeks back I read of Seagate‘s Momentus XT hybrid hard drive. What’s a hybrid? It combines a conventional hard drive with a small SSD in one standard-size, standard interface package. The idea is that the conventional hard drive provides useful capacity while the SSD provides a significant performance boost. To the Operating System, the drive simply appears as any other drive. There’s no special OS support or drivers needed either; for instance, no need for TRIM support. Seagate has developed a special algorithm – they call it “Adaptive Memory Technology” – which purports to analyze use patterns and optimize the use of the SSD portion of the drive. What you use most often is stored in flash for best performance. The end result is supposed to be a drive that delivers much of the performance of an SSD at a cost that won’t break the bank.

The Seagate Web site might not be the best place to find objective comparisons, but check out the video (scroll down to the headline Compare solid state hybrid drives to SSD and HDD.) to see some impressive performance.

When I built my last desktop I (briefly) considered a pure SSD for the boot drive but decided against it. The cost was crazy high and the capacity was crazy low. When I read of the Momentus XT it didn’t take much to convince me to give one a try.

I decided on the ST95005620AS as a replacement boot drive. This is the 500 GB unit and, other than the built-in 4 GB SLC NAND SSD, it has some fairly conventional specifications – not at all unlike the Western Digital WD7501AALS it replaced. These drives are new, so it was a couple of weeks to wait for stock. I’m fortunate in that Newegg has a local distribution facility; once a drive was available it arrived the next day.

My desktop case (a Cooler Master HAF 932 #RC-932-KKN1-GP) doesn’t provide mounts for 2.5-inch drives so I picked up some adapter rails, too. These rails will hold two 2.5-inch drives but there are a couple of quirks. They use some odd-sized screws (supplied) and the holes were too small for my no-tool drive mounts. I mounted the hybrid in one of the front-accessible bays with the supplied screws. I may eventually drill and tap the rails for standard screws and relocate it to the drive cage for a cleaner cable layout.

I have a few applications for cloning boot drives. I don’t like any of them so I decided to try Seagate’s DiscWizard tool (made by Acronis), free for the download. Installation was quick and painless. But the clone process failed every time! Shame on me for believing you could do a low-level task like that from inside Windows. Fortunately DiscWizard provides a tool to build bootable utility media. I used it to configure a USB drive, booted from it and in short order I had my clone. In my case the target drive was smaller than the multiply partitioned source drive, but the DiscWizard handled it perfectly.

Now, cloning a boot drive is faster and worlds more convenient than doing an IPL from scratch, but it’s not without problems. Sometimes, if you run application software that requires activation, it may notice that the hardware’s changed and void your activation. I had several of those but all were resolved in short order. It’s just something to be aware of. Check your application load and have your necessary licensing information at the ready if you need to contact your vendors.

Okay, so how’s the Momentus XT work? Very well! What’s more, it seems to be getting even better over time. It’s weird.

Boot time is about half what it was with the old drive. It’s dead quiet, too, where the Western Digital is one noisy unit when it seeks, at least in my cavernous case. For the applications I use all the time, first-use loads are near instantaneous. Under Windows 7, the drive part of the Experience Index remained unchanged from my earlier drive but that didn’t surprise me because the specifications are virtually identical. The real difference is first-use of applications and data. There the performance boost is definitely not something you need to try to notice; it’s that obvious.

The jury’s still out on long-term reliability. I only buy Seagate and Western Digital drives, and I’ve had more Seagate failures over the years. To be fair, warranty service from both vendors is always as quick and easy as you can expect.

This isn’t a pure SSD, but Seagate appears to deliver on its promise with the Momentus XT: much of the bang of an SSD with significantly less cost, reasonable capacity and transparent Operating System support. Performance increases are right where you notice it most, on the stuff you use most often. The Momentus XT is positioned as a laptop drive but with these specs it works equally well for desktop applications.

Go and get yourself one of these, you won’t be disappointed.

The Newest Build

There were two main reasons to build this computer. Damian’s laptop, a hand-me-down almost 8 years old, had been showing signs of impending failure for some time. No surprise, he runs it 24×7 and the heat has physically damaged the finish on his desktop. And Pam, who plays Sims2 on her relatively recent desktop-replacement laptop, had been grumbling for a little more oomph. A plan was laid and by Christmas each would have their upgrades.

The Core i7 CPUs were just hitting the shelves and I briefly considered going that route. The on-board memory controller, new for Intel, meant new motherboard designs and chipsets. With reliability (not to mention my wallet – the i7s are kinda pricey today) in mind I chose the Core 2 Quad Q9550 instead. Well-supported, I’ve heard of folks pushing the 2.83 GHz part to 4 GHz and beyond. Cooling is always an issue but I didn’t want the hassle of liquid systems so an Arctic Cooling Freezer 7 Pro was added to the list.

The Gigabyte GA-EP45T-DS3R motherboard has been getting excellent reviews for its tweakability and DDR3 memory support so it was added to the list. Everyone knows that memory is king. I started with two sticks (4 GB) of Corsair 1333 Mhz DDR3. It’s an easy no-loss jump from there to 8 GB. And if swapped for 4 GB parts, this board will hold 16 GB so there would be some headroom left for the future.

The next choice was the GPU. Wow, things had come a long way since I last paid attention! After an evening of digesting reviews a choice was made: the GeForce GTX 260 Core 216 from EVGA. The 896 MB NVIDIA-based unit turns in solid performance for the price and also has some potential for tweaking later.

Key to user satisfaction is a good monitor choice and one in particular has always stood out: the HP w2408h. 24 inches of HDMI, 5 ms, high-contrast saturated colors with a native 1920×1200 resolution. Sometimes you’ve got to just swallow hard and go for it, and this was one of those times. Pam would be delighted with this monitor, and that’s what I was aiming for.

The rest of the component choices were rather pedestrian. A DVD-RW drive for loading stuff, a Western Digital SATA drive for holding stuff, a Microsoft wireless laser mouse for pointing at stuff, and a WLAN card to avoid a new cable run. A nice-looking, well-built Antec P182 case would hold all this nicely with plenty of room for expansion. Oh, yeah, and an OEM 64-bit Vista Home Premium. Y’know, buying a copy of Windows always leaves my stomach a bit unsettled and this was no exception – not to mention that this would be the first Vista box in the house. Well, at least it shipped with SP1…

A bit of back-of-the-envelope power analysis called a power supply of 650-700 watts, so a BFG Tech ES-800 was added to the list. (This PSU would end up failed in less than a month, hmmm, more on that in a future entry.)

The final order was placed with Newegg and soon the components were coming in. Between these and other Christmas shipments our UPS driver was becoming a daily visitor!

Physically, the build went quite uneventfully, easily even, thanks to component standardization and that well-designed Antec case. Oh, there were the usual share of driver issues, a BIOS change or two, a few ‘trial’ Windows installs, stuff like that, but nothing that couldn’t be handled. Vista reported a base score of 5.9 for every subsystem, the highest available as this is written.

Pam named her new rig Thor. Then the machine-shuffling got started in earnest.

Overall I’m pleased with the result, but there have been a number of… interesting… things that I’ll talk about in subsequent entries. Like that failed power supply, for one. Stay tuned.

Virtuality

Well, VMware Server 2’s been out long enough without panic-updates so I finally got around to upgrading one of the servers.

There were only five VMs on the target box; the backups – about 250GB worth – went quick enough, disk-to-disk. The VMware software on the Win2K host also went rather uneventfully. Then the fun began.

There’s no standalone management console now, all that stuff is done through a Web interface. I like the Web as much as the next guy, but let’s face it: it’s slower. I haven’t had any trouble with it – yet – but I’m waiting. Next, the remote consoles to the VMs are implemented as a browser plug-in. Fair enough, but try as I might I’ve been unable to get the plug-in to be called by Chrome. I thought I’d have to use IE (it installs fine on IE7) but then I found that one can generate a shortcut that calls the plug-in exe file (my laptop runs XP). The end result is that I can manage the host with Chrome and call VM consoles up as needed. Well, the Windows VMs, anyway. The Linux VMs are fine, as usual with SSH.

Then there’s the VM updates themselves. It’s a one-way process (another reason to have good backups!) and you get a reasonable warning before you proceed. Of course, when the VM’s OS wakes up quite a bit of the virtualized hardware has changed. That means driver changes and such, it’s as though you changed motherboards or something equally traumatic. In my case it all went okay, with one exception. A Windows Server VM would no longer start SQL Server 2000 for lack of a DLL: msvcp71.dll. As it turns out I had one handy – quite accidentally, I assure you – so I copied it to the VM’s WINNT directly and all was well again.

I generally use the VM Tools, too, so those were next. The updates were intuitive, but different. From the Server management interface, the necessary files are placed on the VM’s CD-R drive. Then, from the VM, you install from there. Now, there’s been one Ubuntu VM that I’ve never been able to install Tools on for some reason. Never could figure out why and it wasn’t important enough to pursue. This time I simply mounted the drive and everything went flawlessly. Go figure.

All the slogging complete it was time for some testing. I’m pleased to report that every VM is showing solid signs of performance increases across the board! Memory management seems significantly improved, as does virtual disk performance. It’s too early to be saying anything about reliability, of course, and I have yet to experiment with other new features. I may even eventually get used to the Web management interface.

So there you have it. Not bad for a couple of hours of work. VMware Server 2.0 is a free download. If you’ve got a spare box hanging around and always wanted to play with virtualization, go give it a try.

Laptops and Hard Drives

My wife’s laptop was getting full. NTFS, as you probably already know, begins to suffer performance-wise when it crosses the half-full line. And the default MFT size is kind of small to begin with. Presently that all-important area was about 98% consumed and the drive itself had only 20% or so free space. Her last install of a Sims2 expansion pack brought another round of complaints.

Easy enough to remedy. Head out to Best Buy for a replacement drive. But how to get the new drive installed and set up as pain-free as possible? Usually it’s a fresh IPL, but I was looking for the easy way out.

I have this neat device from CoolMax. The CD-350-COMBO is a multi-headed cable that plugs into a raw IDE or SATA drive and presents to your system as a USB device. When your laptop is your workbench this device is worth its weight in gold. Soon the new drive was partitioned, formatted, and tested. (For good measure, I allocated a much larger MFT as well.)

With that problem solved I turned to the task of cloning the existing drive. I recently read of something called XXCLONE, which promised a file-by-file copy (including all the locked stuff) from a running Windows system, with the ability to make the destination bootable. This would be a good time to try that out.

The install to the wife’s laptop was easy enough: unzip and copy a file. I used the CoolMax adapter to cable up the new drive, the destination for the copy. I set XXCLONE to task and went away. The copy would take a while. When I returned it was finished. I made the new drive bootable with a couple of clicks, uncabled and shut everything down. It took a few more minutes to physically swap the old drive for the new one.

The first boot took a little longer than usual. Windows was a little confused, I guess, because the drive change triggered the New Hardware Wizard. But soon things settled down. Between these two tools, a usually-tedious job was turned simple!

There’s one other thing I should mention. The XXCLONE documentation claim that because it makes a file-by-file copy, it defragments the destination drive automatically. I run Diskeeper on all of our machines, and it reported the drive as heavily fragmented. I needed to run the boot-time defragmentation job before the new drive delivered its expected performance.

Additional stuff, 17 December 2008: There were a couple of nagging issues following the drive cloning. I’m not sure if it’s XXCLONE or if it’s integral to the cloning process itself, but some applications installed with the MS Installer were no longer accessible through Add/Remove Programs. Instead there would appear a dialogue:

“The patch package could not be opened. Verify that the patch package exists and that you can access it, or contact application vendor to verify that this is a valid Windows Installer patch package.”

The solution, while a bit of a pain, is to obtain and install the Windows Install Clean Up utility from Microsoft. Run the utility and select the errant application from the list, then clean it up – which amounts to removing it from the installer’s database. Finally, re-install the application.

In my case it was Office 2003, which called for finding the license number and install media as well as a few rounds of patches and service packs. There were a few other applications as well, but that was the most substantial.

Tagging

I was talking with some folks the other day about, um, blogs. A meta-discussion, if you will. The upshot of the thing is they convinced me to give tagging a try. It would work especially well for me, they reasoned, because I use so few categories.

So this morning I spent some time going back through the posts and applying tags. My eyes hurt. Did I really write that drivel? [shrug] I grew a ‘tag cloud’ – not the most attractive thing in the world – and lost the original edit dates on the affected posts. So, on the off chance that you’re wondering what changed, the reality is that no text of any substance has changed. Just the tags.

—Added 5-Nov-2008: Okay, so I got tired of seeing the ‘tag cloud’ in the sidebar. It was just too big and intrusive! (I thought so, and others have said as much in email.) Besides, it showed up in a summary of this URL and I’m not so sure that’s good food for the search engines – it looks like spam. So, bye-bye tag cloud – for now at least – although I’ll keep adding tags to the new entries as I write.

Mobile Phone Adventure

Verizon Wireless, my mobile carrier, has been pestering me lately. An equipment upgrade offer was pending. My pair of old Motorola RAZR V3c handsets serve me quite well so it seemed like a perfect opportunity to add a third number and a new handset for my son, something we’ve been talking about for a while. Yesterday we stopped at one of their local brick-and-mortar facilities to get that done. I don’t know about you, but every time I have to physically show up to do something with my mobile phones there is trouble of one sort or another…

I’m an unusual wireless customer. I use my phone to make and receive voice calls. For email, Web, music, pictures, videos, ad nauseum, I’ll reach for a more appropriate piece of equipment. I’m not thrilled with Verizon Wireless’ closed network, either, or the way they nickel-and-dime you for every little thing. But their performance – at least where I use it – is second to none. I cannot recall the last time I had a call drop or not go through. Each ‘line’ (an archaic term in the wireless world) draws from a single pool of enough minutes that we use it without thinking and never need to buy extra, thanks to a reasonably priced grandfathered contract, sans enhanced services, that they haven’t offered in years. I’ve been a steady customer for better than a decade and a half. I’m an unusual customer.

We found a handset my son liked and made our way to the counter only to learn that the upgrade offer applied only to my V3c. But nothing’s carved in stone and after some discussion we found a way: a temporary upgrade. I buy a new handset (an LG VX9100, free after the promotion) and move my number to it. I buy an additional ‘line’ for my son, and assign the new number to my old V3c. Finally, the next day, we would swap the numbers between the two handsets, under the auspices that I’m unhappy with the new handset. Normally that swap would be $20 a pop, but there would be no charge. And everybody would be happy.

A while later we discovered that my V3c didn’t respond on the new number. Things went downhill fast from there. Tech Support reported that the new number belonged to a Blackberry belonging to Merrill Lynch, that my contract shows only two numbers, and that my V3c ESN no longer exists. Oops.

Back at the store they tried to get me to just replace the handset, “Just take the best we’ve got, no charge!” No thanks, I want the one I’ve got, please fix it. They finally managed to install a dummy ESN onto it and assign the new number, and get my contract to recognize them both. But because of the dummy ESN the handset doesn’t do anything, it’s a brick. Tomorrow, they say, they will be able to finish straightening it out.

I need to digress with some history… Verizon Wireless was probably the last carrier on Earth to add the incredibly popular – and profitable – Motorola RAZR handsets. The reasons were two-fold. First, the CDMA chipset was physically larger, and Motorola had some difficulty making it fit into the small package. Second, all Verizon Wireless phones (at the time) sported an external antenna, which helped them to provide their outstanding network performance. The RAZR’s antenna is internal. As for me, I wanted the small size but I was unwilling to switch carriers. So I waited it out. Eventually Motorola got the hardware into the handset and got the antenna performance good enough to pass Verizon Wireless’ performance testing (it took several rounds of testing which led to yet more delays). Finally they were set to roll ’em out. Just in time for Christmas! Well, sort of.

In the mobile phone industry, a hardware manufacturer will develop a new handset and the base software to make it the features work, as well as an SDK. A carrier will take that and develop their own software layer, which in turn becomes the set of services and capabilities that differentiate one carrier from another. In the case of Verizon Wireless, with their closed network, part of their software development is to lock down the handset. The customized RAZR software, due to the Christmas sale deadline, was a rush job.

Watching all that unfold, I bought my handsets a day or two before they became available at the stores. My handsets are not locked down. The best thing about this is my Bluetooth profiles include OBEX. And that means I can add custom rings I make myself, get images and voice recordings on and off, use the crappy little camera (when needed and nothing better is available), use it as a wireless (or wired, via USB) modem with the laptop, and so on, all without incurring Verizon Wireless charges.

And that’s why I don’t want to give up these handsets or upgrade their firmware. Whenever I need to explain this, the representative smiles and understands. [Ed. 6 July 2008: My wife, OTOH, never really understood why I held those capabilities so dear. That is, until the latest bill arrived. My son had bought a ringtone. $2.95, no big deal, but the browsing charges, the megabyte charges, and the fact that he tried the Web browsers on all of our handsets by the time he was through, had brought the cost of that stupid ringtone to near $20. When I explained how billing works, and had real examples to use, the lightbulb went on.]

So today I will see whether they can get this mess straightened out. I’m nervously optimistic.

Upgrade

WordPress 2.5 has been out for a while now and I’ve been wringing it out offline. There have been lots of complaints about the back-end changes for this release but y’know, I rather like it myself. It’s a rainy Friday, and I’ve been up to my ears in paperwork for much of the morning. What better thing to do than mop up the test stuff and do the darned upgrade already? There, I feel better already.

As usual, if you notice anything gone kerblooey please let me know! And a big THANKS to the WordPress team for a job well done.